My son and I took a walk in our woods, across the street from our house tonight. The leaves are all developed now, and we’ve gotten a lot of rain the last few weeks so it’s very dark and dense in the forest. Here are some cool photos of our walk:


My son and I took a walk in our woods, across the street from our house tonight. The leaves are all developed now, and we’ve gotten a lot of rain the last few weeks so it’s very dark and dense in the forest. Here are some cool photos of our walk:
Our maple syrup making adventure is over for the year – It’s still prime collection season but we were having trouble cooking it all up inside the house. We have a propane-gas stove, and propane is not cheap. Plus I just didn’t like leaving it cooking for so long at a time. Next year I will need to figure out a way to boil it outside, preferably using some kind of wood burning set up. The collection bags weren’t the best option either, but they did the job. I ended up using large sticks to weigh them down so they wouldn’t get out of place. My sister Diane, commenting on my last post, told me about our parents using old milk jugs to collect the sap, which I still don’t remember. I’m older so I don’t know how she remembers these things better than I do. So next year, instead of using flimsy sap bags, or expensive buckets, I will use old milk jugs. For a couple weeks of collecting and boiling, we did pretty well in my opinion. Considering that the sap to syrup ratio is about 40:1, I think we got enough for this year:

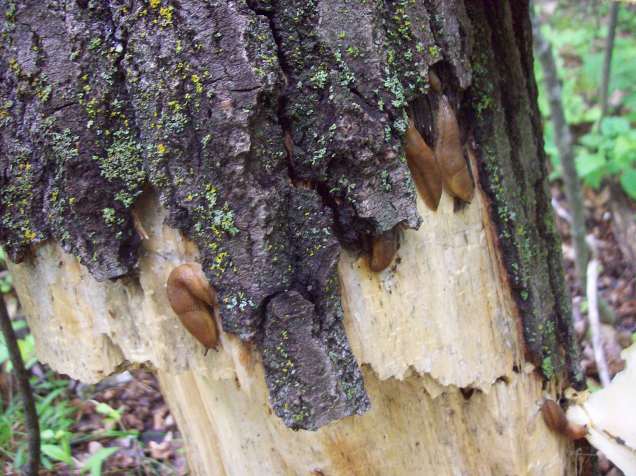
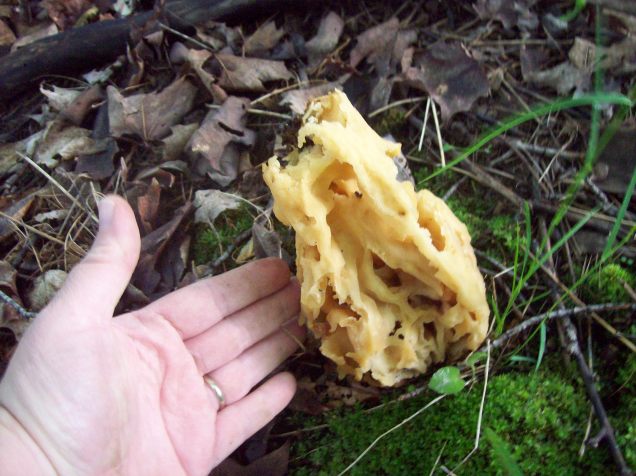
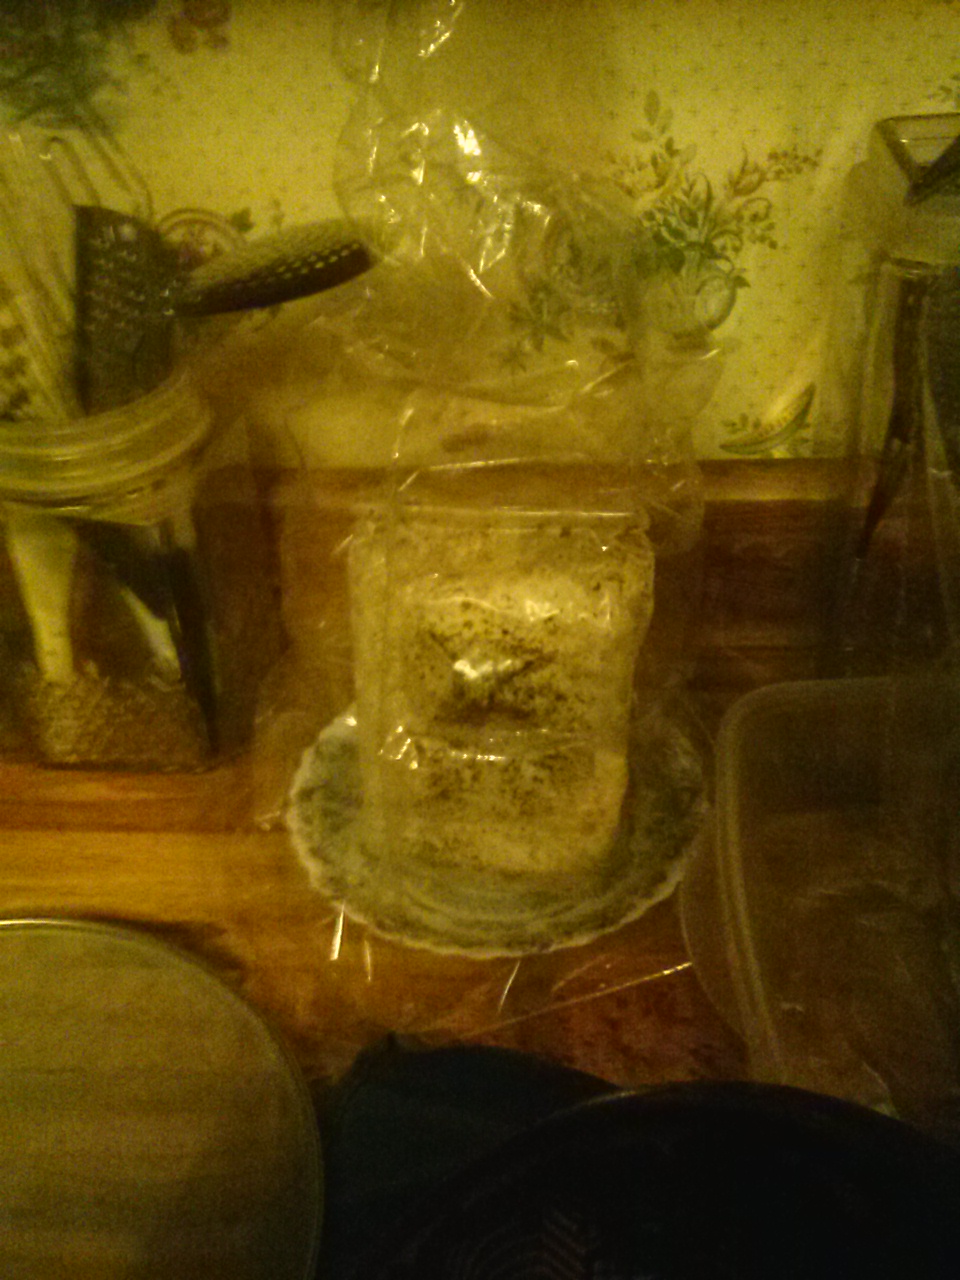
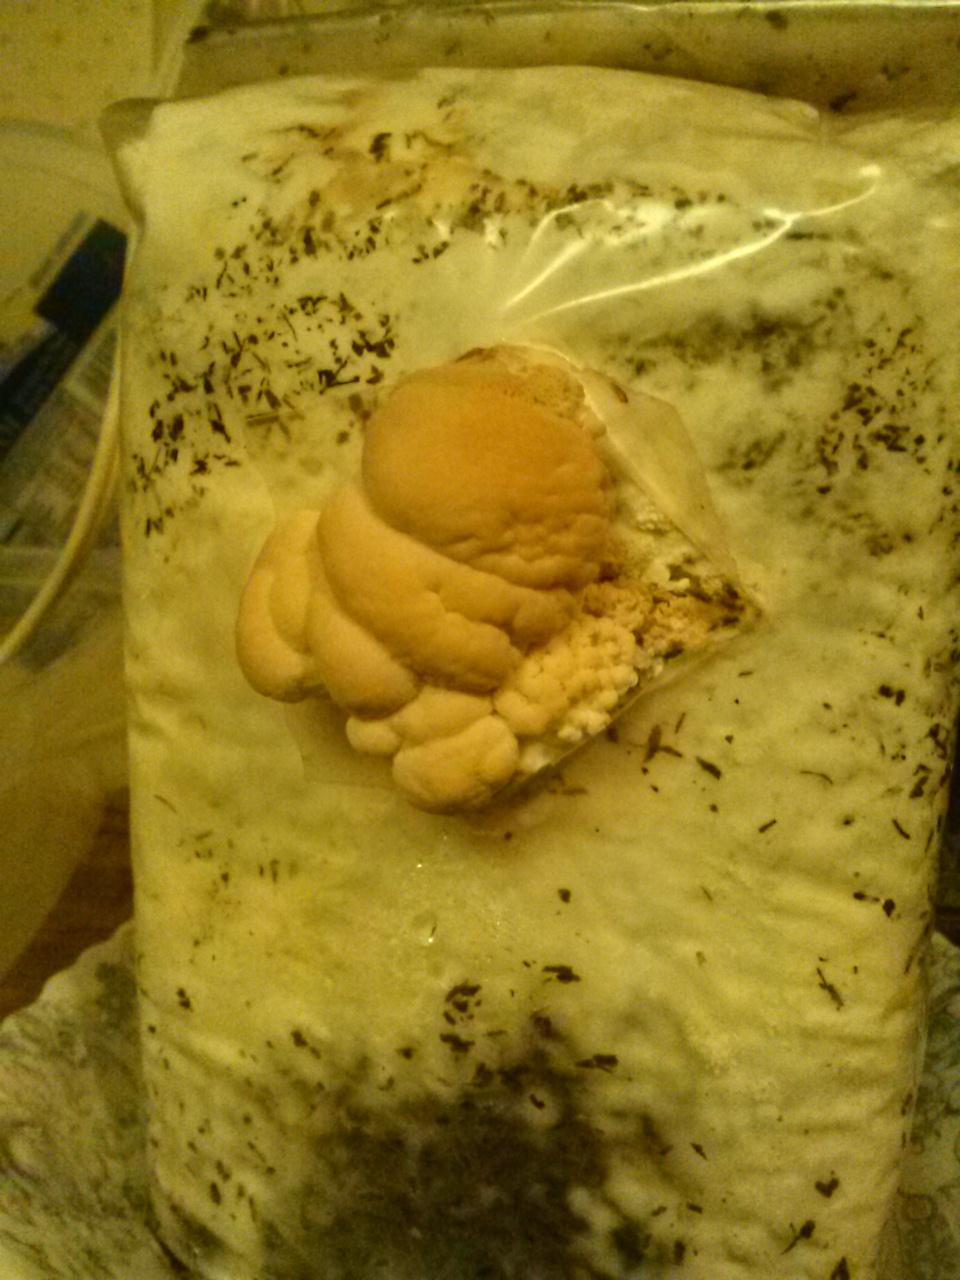
The Mushroom kits I’ve been growing have done somewhat well – It’s possible we just don’t have the moisture in our kitchen that they needed, but I was expecting a little more at one time. The oyster mushrooms only gave us a few mushrooms for their first flush. The pom pom blanc, which were supposed to taste like crab meat, were not as good as I hoped. The mushroom clump doubled in size since my last post, and I wasn’t really sure when I should harvest them – they started to look like the pictures you see online of them – with some little tendrils (kind of like a lion’s mane) – so I thought that was the right time to pick them. I cooked it up in a little butter, so as to not drown out the flavor, but I was unimpressed. The shiitake are doing well, here is the large mushroom that is currently growing:

There are little baby mushrooms on the right side of the log, and in the picture above, I think the white webby-looking stuff on the bottom may be another cap forming – it has a similar appearance to the cap of the large mushroom, but it hasn’t actually popped out of the log yet, so I can’t really be sure. I’m very excited to eat the shiitake mushrooms, since I know I like them. The oyster mushrooms were very good too, we just didn’t get a lot. I have the oyster and pom pom blanc logs drying for now, and in a month or two I will try to start them again – you are supposed to be able to get a few flushes.
Our six little chicks are growing up. They have changed a whole lot in their three weeks of life. I’m really excited to see their coloring change – some have changed in unexpected ways. I’m sure they will change a lot more as they grow up too. I’ll have to wait to see what kind of chickens they are (and what gender they are) until they are almost or fully adults. Here are their updates, along with pictures of when I first got them, so you can see the difference three weeks makes.

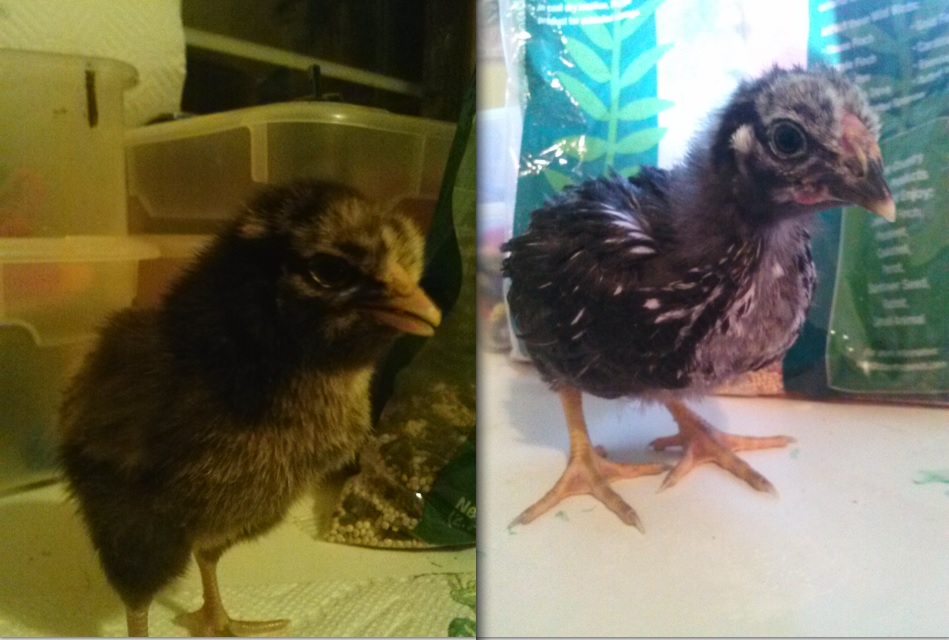
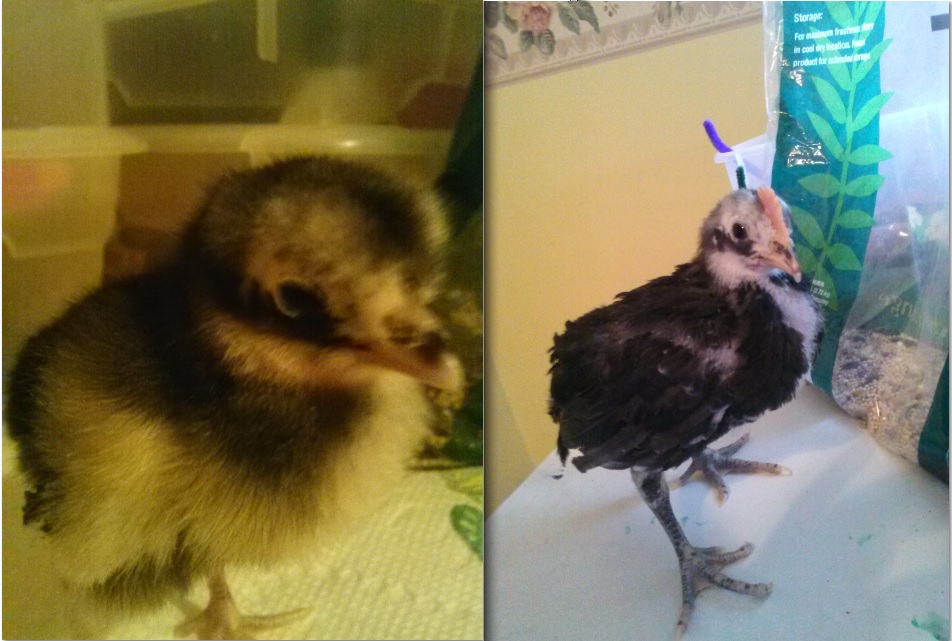

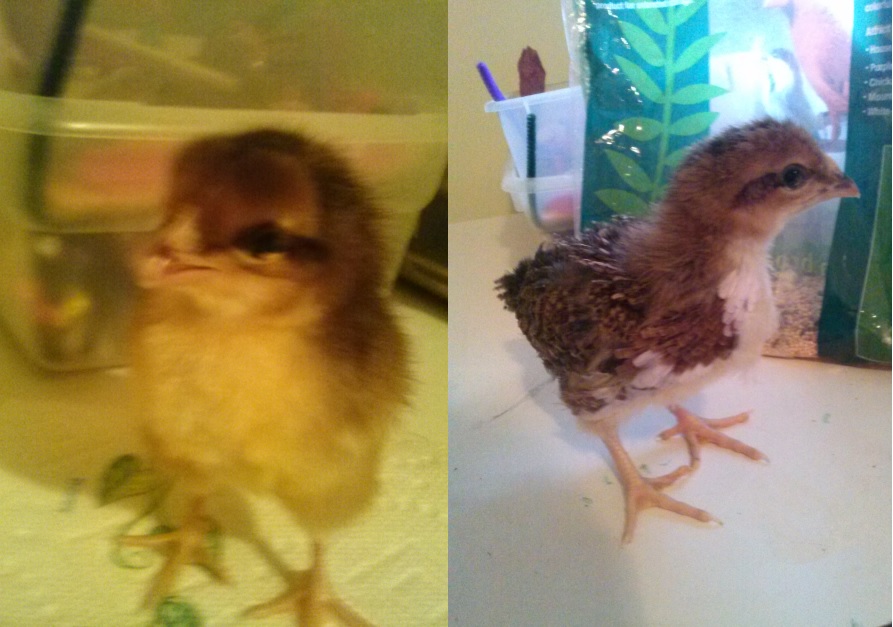
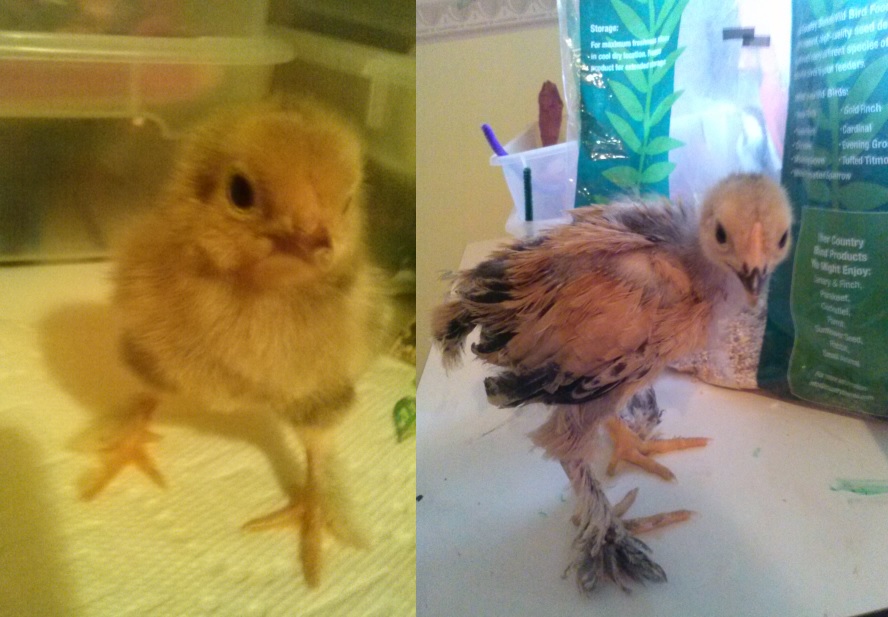
I’m really enjoying watching them grow. I will be getting the replacements for their fallen brethren around April 20th, so I will have even more chicks to watch grow up at that point. Some day my spare bedroom will stop being a chicken nursery. Until then, this is pretty fun.
I have been wanting to buy one of the “grow your own edible mushroom” kits for a long time. I heard about morel kits, and since last year I couldn’t find morels in the wild anywhere, I decided I wanted to get a kit to grow my own. I found one website that had a special, where you could get an outdoor morel kit along with three other indoor edible mushroom kits, for a good price – under $80 for all 4 kits. Usually morel kits are $25-30 on their own, depending on which website you look at. I got my kits from the Gourmet Mushrooms website. The combo special I ordered is called “Gourmet’s delight.” It came with a morel habitat kit, a shiitake mushroom kit, an oyster mushroom kit, and a pom pom blanc kit.
The morel kit is in the fridge until spring when I can get out and work the soil to plant them, and I won’t actually get mushrooms from it for a year or two. If it works it will be well worth the wait. When I got the kits I set up the three indoor kits right away.
The kits consist of a “log” of sawdust or other material, inoculated with spawn of whatever type of mushroom. They come with instructions, and it has been pretty easy. We got a small flush of oyster mushrooms so far. I got pictures of them when they were first starting, but we ate them too quickly for me to get a pic of the fully formed mushrooms. I’m not sure if this first flush is over or if we will get some more oyster mushrooms. You can dry out the log between flushes, and it should give you 2 or three crops of mushrooms.

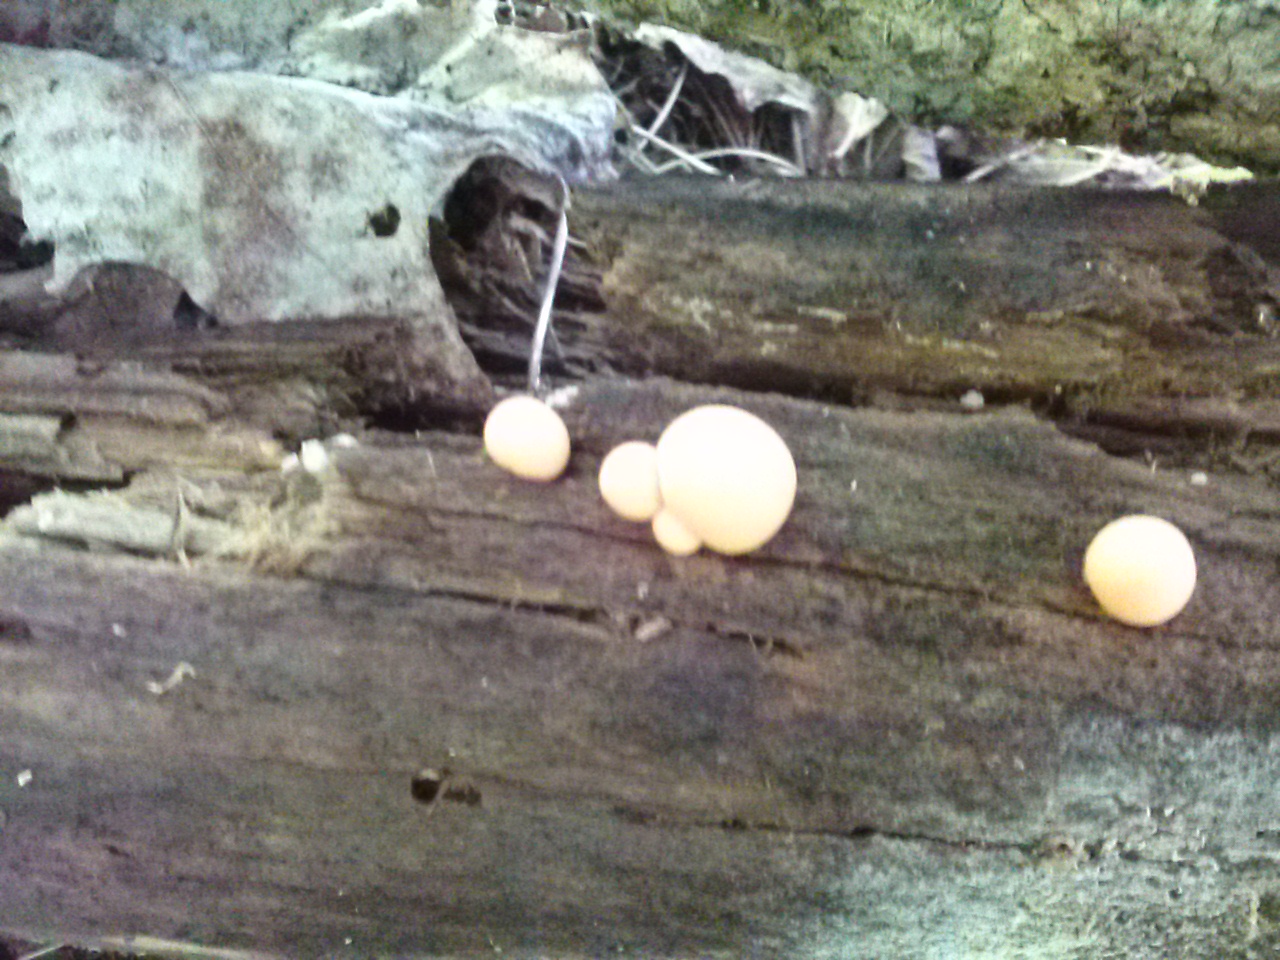
We are getting a flush of the pom pom blanc, which I have never tried but it is said that they taste like crab meat. That sounds delicious. Here they are forming:
The shiitake log has not formed a flush yet, but the instructions for that kit are a little more complex than the other two, and it says that they can take a couple weeks to start forming. I should see them start any day now. I’m excited for when they grow.
So far it’s been fun (and delicious) to grow indoor mushrooms.
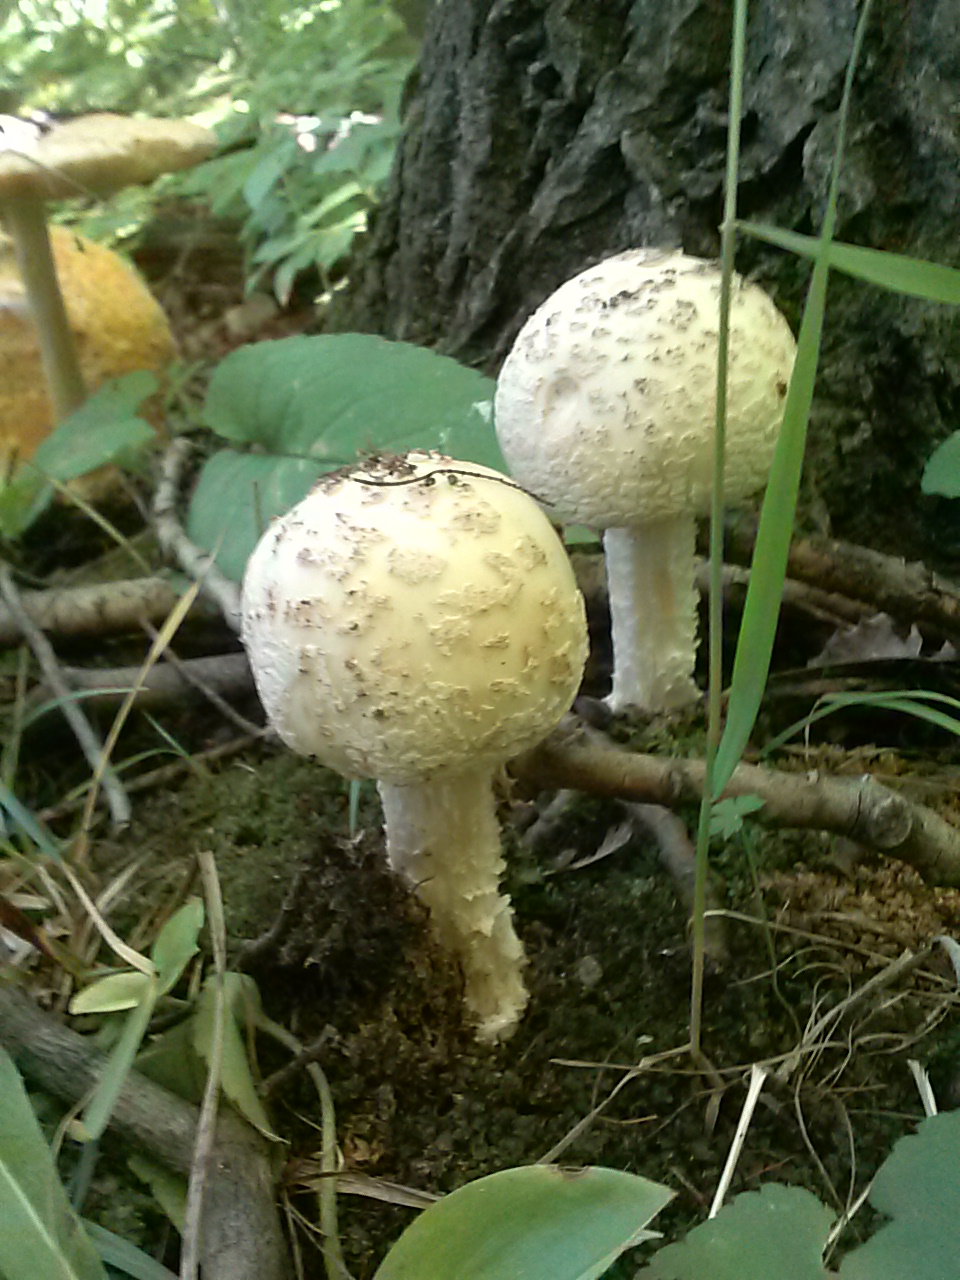
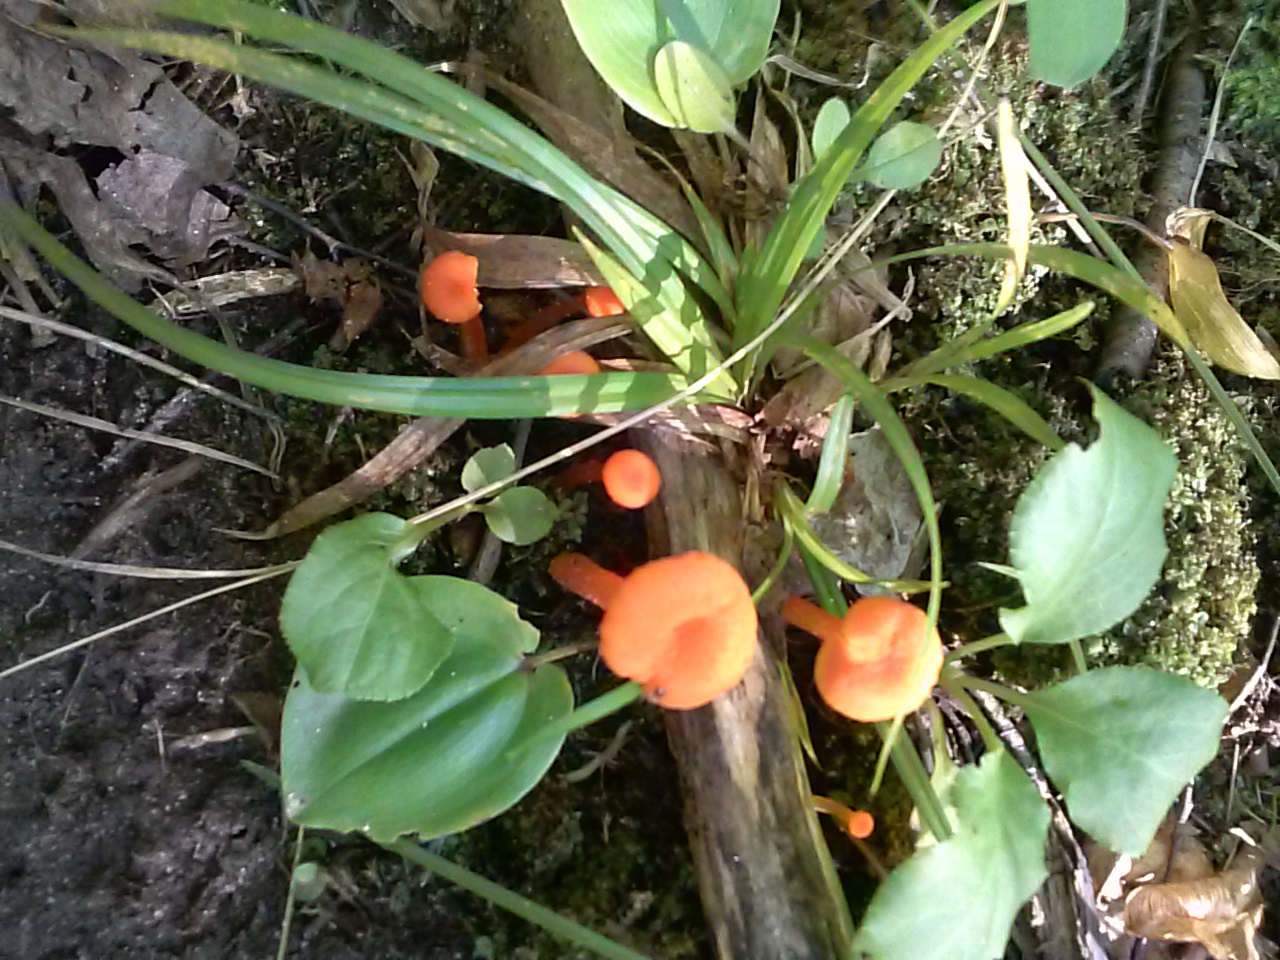
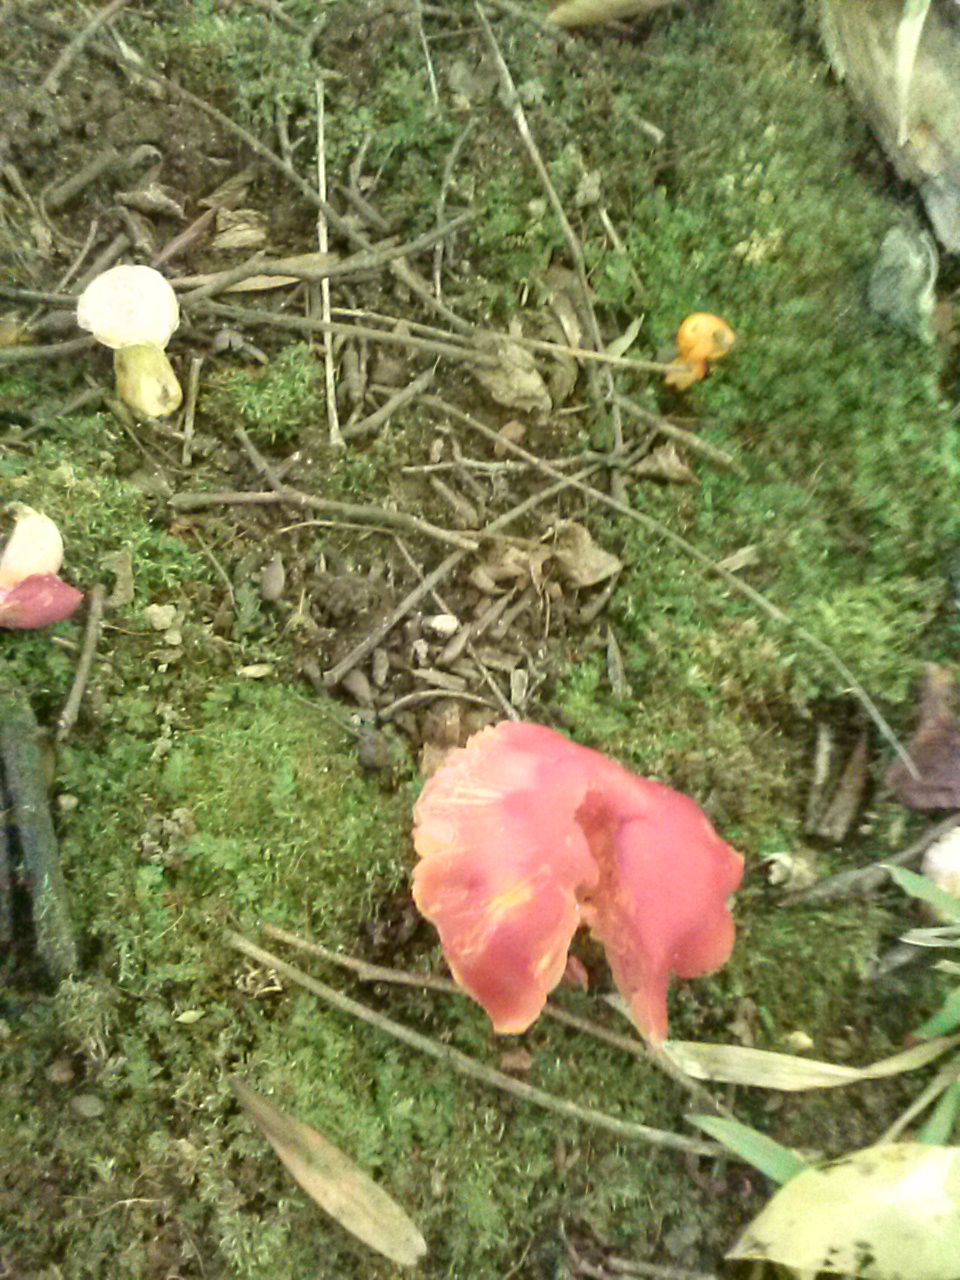
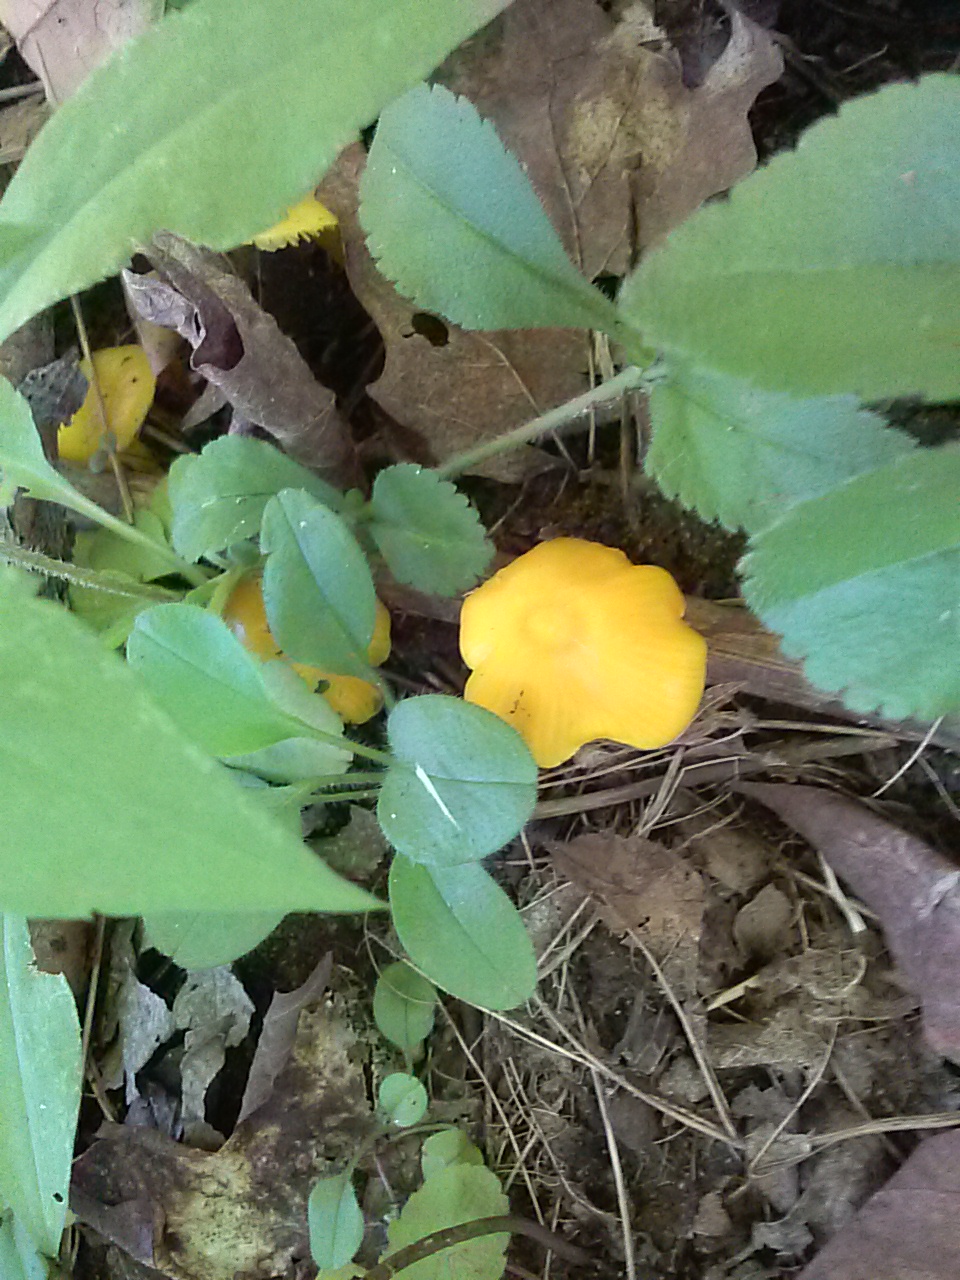
I love mushrooms. We had a plethora of them sprouting up all over our yard and woods this year. Most of them are probably not edible, but they are beautiful. My favorite edible wild mushroom is the morel, which sadly did not appear for me anywhere last spring. I looked everywhere. In early summer we had a few random mushrooms sprout up but in mid to late August we had tons everywhere. Below are some pictures of the various mushrooms we found this year.