My new, main garden bed is doing better now, since the temperatures have been getting a little warmer. We’ve been in the 60s and 70s and most of my plants, and seeds, seem to be actually growing and sprouting now. Here are some pictures of my garden:
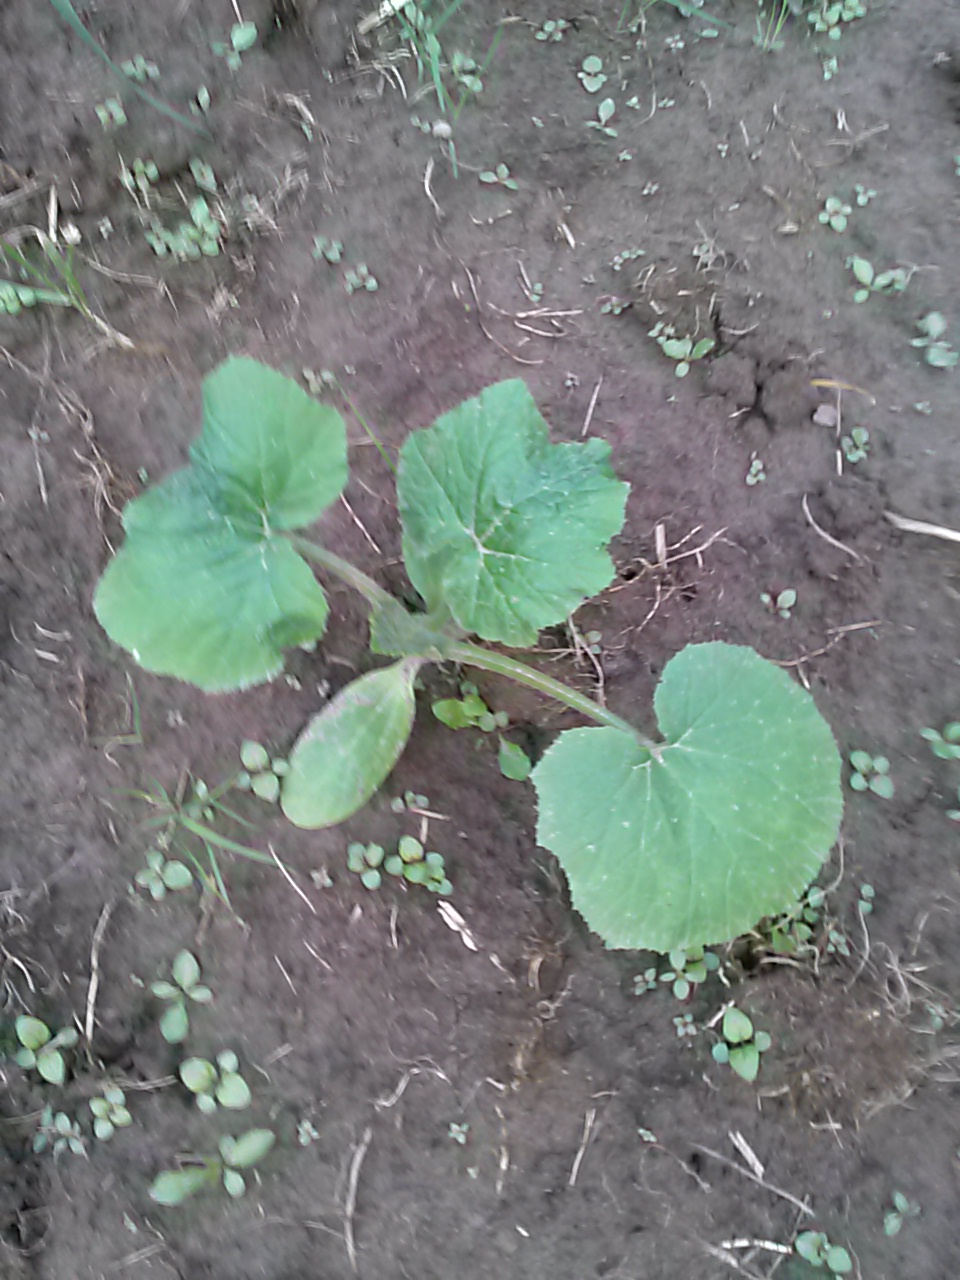
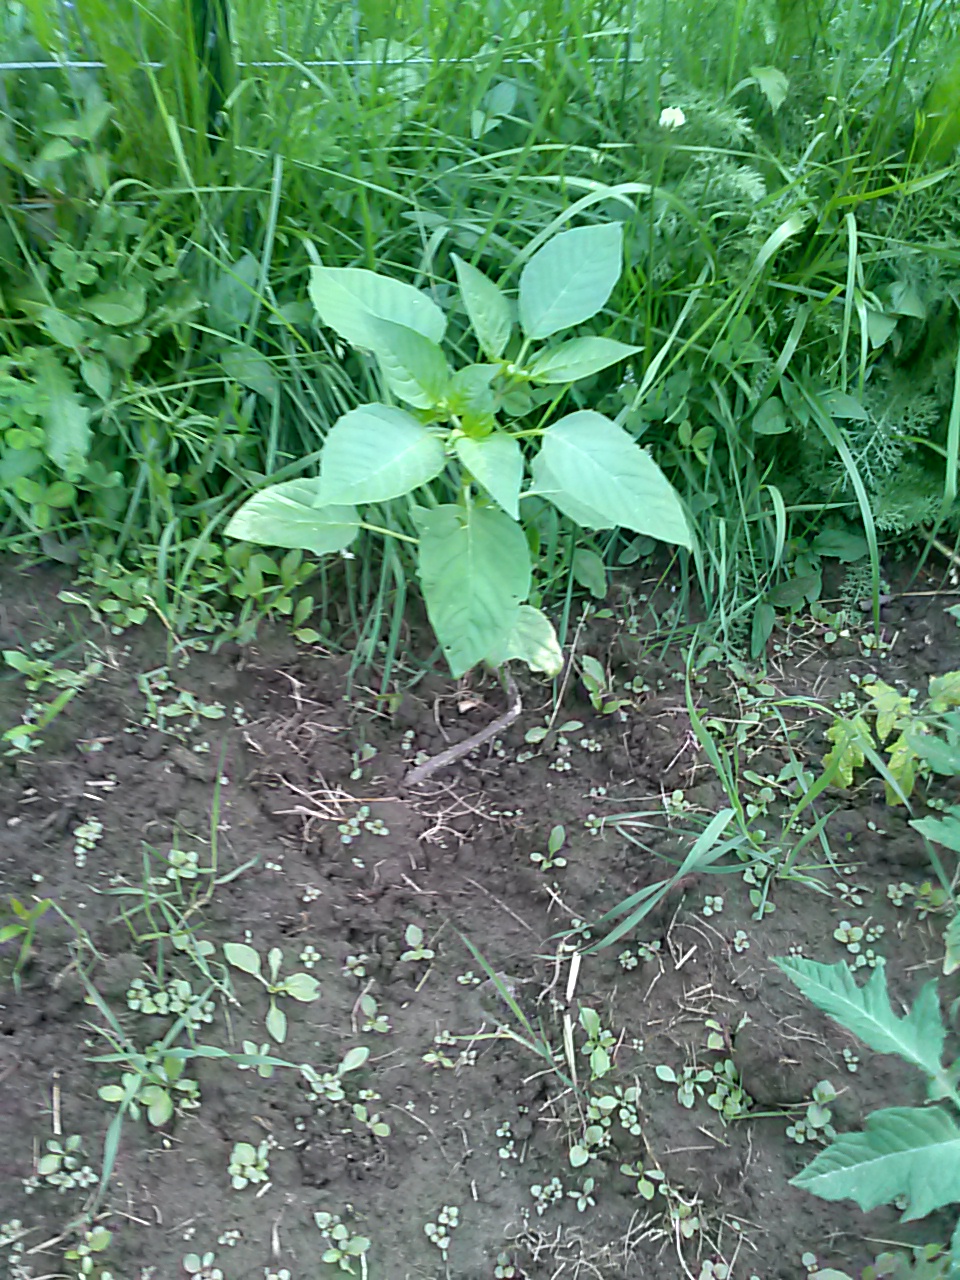
This picture doesn’t look a whole lot different from the one I posted earlier in the month, but individual plants are doing better. I know it will look a lot fuller by this time next month.Here is one of my Amaranth plants. I grew them as seedlings, hoping to do a larger area of them, but I ran out of room. This is the first year I’ve grown it so I want to try it out and see if we even like it before dedicating more garden space to it.My tomatoes are doing better than they were when I first transplanted them. I’m going to give them a bit more time before attaching them to their trellis.Here are some sunflowers. I put some seedlings in, and they didn’t seem to be doing so well, so I planted seeds directly in. They are all growing fine, so I will have quite a few. I think I have 10, and they are a mix, some giant; some yellows and oranges that get tall with smaller flowers.This was supposed to be all corn – white corn on the left, and yellow on the right. I have one or two white corn that sprouted. The yellow corn is doing pretty well. I just planted some more yellow corn seeds in where the white corn was supposed to grow. I have flowers growing along the pathway. Some black eyed susans, evening primrose, and others. As you can see, I have a big job of weeding ahead of me – I am waiting till the weeds are bigger and easier to pick.Here are my little yellow corn plants.A squash plant. I’m not sure what I have where anymore with the squash. I replanted seeds, and leftover seedlings, where original seedlings had died. I think this is a yellow squash. I should end up with a few zucchini, yellow squash, and acorn and butternut squash plants, I think. I will find out when they grow.A calendula flower plant. I’m excited, this is the first time I’ve grown them. They are supposed to be pretty, and also medicinal/edible.Some of my peas. They are just now starting to climb their strings.A tiny tomatillo plant.A big tomatillo. This is one of the original-started seedlings. It is the only one that survived that planting. I planted the smaller one, in the picture above this, later. Unfortunately this one is getting flowers, and they need to cross pollinate to get any fruit. We’ll see if I get any this year. My other plant is very small compared to this one.One of my artichokes. I love artichokes and heard they will grow as an annual here. So far my 9 seedlings that I put into the garden are all doing great.
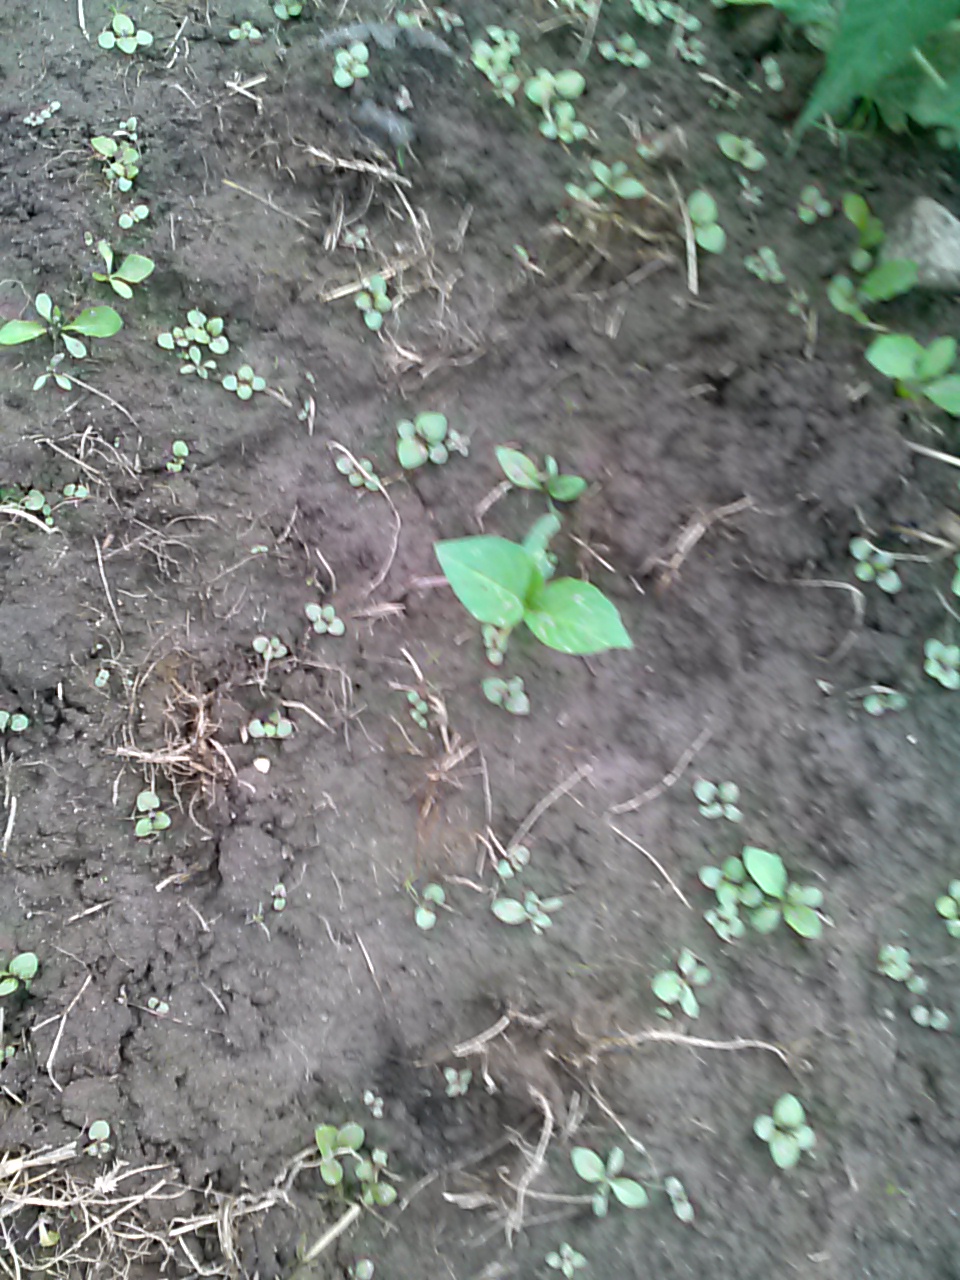
My back garden, which I increased in size from last year, is doing ok. I have a lot of things growing in it, most of which was not what I planted. I have a lot of weeds, but luckily they are mostly lamb’s quarters, which are edible and actually really delicious (they taste kind of like spinach). I liked the few we found last year so much that I bought seeds for this year, and then didn’t have to plant any – they grew on their own. Here are some photos of my back garden plot.
Here is the bed that is mostly full of lamb’s quarters. I am going to let them grow a bit more before harvesting. I have some stuff I planted that is (kind of) growing in amongst all the lamb’s quarters. This should be Kale, beets, onions, and carrots.Here are some of my turnips. I planted a couple of small rows and they actually all seem to have sprouted, and are doing well. I like turnips when they are smallish – we cook them in butter. I haven’t had them in several years, but, yum.I think I have found four carrots in amongst the lamb’s quarters. I have replanted more seeds so hopefully here soon we will see more. Here is one of the four I have found.I might have a few onions, I planted a couple rows originally but have only found a couple. Here is one of them. I replanted seeds again this week so should see more soon, hopefully.Here is my kale. I grew these inside at first as seedlings and then planted about 20 of them in the garden. I think most of them have survived, and are doing well. The leaves on this one are about 5 inches long.I planted a little raised area next to my strawberry patch (which is also in the back garden plot) with chard, lettuce, and spinach. Here is my romaine. I put seedlings in and most are still there and doing well.This is part of my strawberry patch. I’m not too impressed – this year I planted 25 plants into a “lasagna” garden. I have maybe 10 that survived. I figure if they all make it I will adjust their positions and let them fill the garden in, instead of buying more plants next year. These are starting to get flowers on some of the plants.Here are some of my brussel sprouts. They are doing good. I have netting over them to prevent stupid cabbage moths from laying eggs. They decimated my cabbage last year.Here is a toad that I keep running into in the back garden. I think he lives there, which makes me happy. They eat lots of bugs. He must get scared each time I come into the garden because he always hops which makes me see him. If he just hid I wouldn’t know he was there.The other night it was going to storm. It was the second time I’d run into Mr. Toad. So I found a flower pot and made him a makeshift toad house. The plants aren’t really big enough to give him any shelter yet. I put him inside, and I saw him in there later on, looking out, like he liked his house.
I haven’t posted in a bit, I’ve been really busy… and we’ve had a ton of rain. The garden is doing ok, things are growing slowly, and my seeds (and second sets of seeds I had to plant) are sprouting, mostly. I planted two types of corn, on either side of the garden. The yellow corn I planted has sprouted, the plants are about 2 inches tall. I got maybe a 70% sprout rate though. My white corn has done nothing that I can see. The seeds were packed for 2014 so that may be the problem. I plan on adding more yellow corn seeds soon.
I had to replant seeds for cucumber, and some for zucchini. I don’t know if they damped off when the seedlings were put in, but the original cucumber seedlings had all died and I have one original zucchini; I had put in 4 seedlings. So I added new seeds; They are now sprouting.
I planted some rows of onions, carrots, beets, and turnips. In that garden, I have a TON of lamb’s quarters (weeds), which are actually really tasty so that is ok. I have a bunch of turnips. I think I have one or 2 onions coming up, and 5 or 6 carrots, and 3 or 4 beets. I will add more seeds for those this week. I’m not sure what happened to those. I did notice a beet growing in my pathway, so the seeds must have gotten washed away somewhat.
We have had a lot of rain. It rains almost daily, and our temps have been in the 60s or so, sometimes into the 70s, but still not as warm as it could be. The rains aren’t very warm rains either. The garden is trudging along. It will do better as we get a lot more sun. My sunflowers are doing ok too, so that makes me really happy. I haven’t had a sunflower grow for me at this house. Last year I lost every one I planted to deer. This year they are planted inside my fence.
Last week, I got home and the chickens were mixed together. From my driveway I can see the babies’ little run. I parked and saw adult chickens in there. I went to see what was going on, and somehow the door that divides their coop space (inside the coop) was left open, so the adults and teens (which are pretty much adults now) were all over in the chicks’ area, and my chicks were scattered. There were 3 huddled in a corner, one hiding behind a food bag, and the rest were outside hiding behind the coop. The adults scratched up the chicks’ run, so it’s a lot more muddy now than it had been. I got them all sorted out, and we’re making absolutely sure that we lock the inside coop door, so that it doesn’t happen again.
As soon as the chicks are 3 months old, around July 20th, I am going to integrate them together. I cannot wait! The reason for this, is that our current adult chicken run is a disgusting muddy mess. We are going to add a second fenced-in run area, an area which currently has grass, and then integrate everyone into that run. We’ll then cut off their access to the current run, so that we can fix the mud problem. I would also like to plant it with some chicken edibles, so they have stuff to munch on over there. The muddiest spot is right at the door from the coop to the run, so we need to figure out what to do there – maybe put some kind of patio (brick/concrete) there so that it doesn’t turn to mud as soon as it rains. Once everything on that side is fixed and plants are growing, I will start cycling the chickens between runs – so they can eat down one side while the other side is growing, and then we’ll switch them to the new grown stuff, and so on. With all our rain, the run doesn’t dry very well, or for very long, and then the teens don’t like to go to bed at night when I put them in, so it takes awhile to get them all in, and we end up trudging through mud, and they all have muddy feet, and it’s disgusting. I do lure them in to the coop with treats, but I have to wait until they are all in and the door is shut, or they take their treats and run outside; then I have to chase them in. Ahh… chickens.
I’ve been working on a new garden bed, and it’s finally ready to plant! I killed most of the grass using tarps and cardboard, and was going to hand-till it all up, but it’s quite large. I started to do a little work on it one night and was very daunted by the work involved. The grass had been very lush in that area – Killing the grass did not kill the roots, so the soil was very hard to dig into even with the grass gone.
I was very lucky and was able to borrow a rototiller from my uncle. So now the soil is ready for planting. We put a fence up around it today to keep deer out. Here’s the finished garden bed:
The long view of our new fenced in garden bedA diagonal view of the new bed.
I have been scrambling to get this bed ready for this weekend, because that was my goal for getting plants in. Our last frost date depends on who you talk to – some say May 15th, some say June 15th. Last year I had stuff in by the end of May and it was ok – you just have to watch the forecast for frost. We had frost warnings last night (I think some places got some frost) and we have frost warnings for the next two nights; I’m going to have to wait to put things into that bed. I do have some things already planted in a different bed, so I’ve been doing the “cover-up” scramble each night: covering up those plants at night, and then uncovering them each day once the sun is warming everything up. I need to check the weather and then hopefully I’ll start filling this bed up in the next week or so.
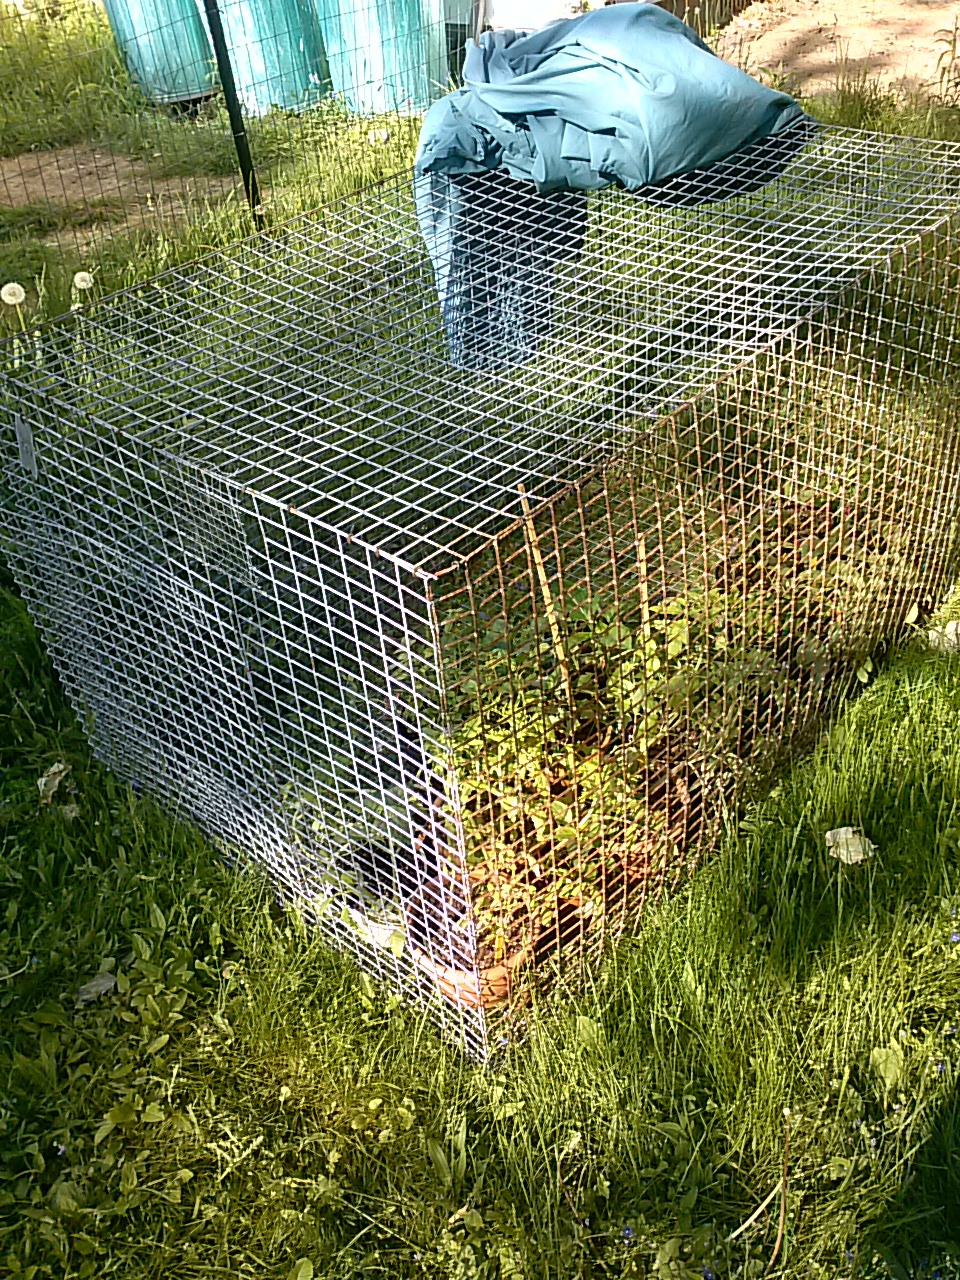
I have some plants hardening off outside. I put them inside a cage we have out there, which is easy to cover in case of frost. The cage also protects the plants from hungry animals. It’s been easier to block sunshine or rain, to get the plants used to being out there without them getting too much sun or water before they are acclimated. I put the plants out to harden off last week, figuring I’d have to block sunshine somewhat, and then we got several days of rain instead.
My plants hardening off in a cage.
I’m looking forward to being able to get everything in the new garden – I just hope our weather decides to cooperate soon.
* WARNING – if you are a vegetarian, you may want to skip this post.
My Silver Laced Wyandotte Rooster
My beautiful rooster got to be a problem – he would not leave my hens alone, he was constantly mounting them. Every one of them has a bare back right now – my white hens still have most of their feathers on their backs, but they always had dirty backs from his feet, and they were losing feathers on their heads. At first I hoped they were molting, but I eventually realized this was not the case, based on where they were losing feathers. I didn’t want to just separate the rooster from the hens, because I didn’t have a separate place to put him. I also know that several of my older chicks are roosters as well, so I will have to figure out who gets to stay/who has to go at some point anyway. This weekend, after spotting more bald spots on a particular hen’s head, I decided it was time for him to go.
I culled him with a quick chop, and butchered and cooked him, all by myself. Here are some things I learned:
1. Always read up on how to do things beforehand. Don’t just rely on stories people tell you, “well, Grandma used to do this…” I did not do research beforehand. I just went ahead and gave it a try. I was not sure how to make certain cuts when butchering. I also didn’t realize how hard some of those feathers would be to get out. I didn’t end up scalding him, so the wing feathers and pin feathers were extremely hard to pluck. I ended up cutting the wings off because I didn’t know what to do to get those feathers out.
2. Always let the meat rest in the fridge for a day before cooking or freezing. In the middle of roasting, I decided I should look up online how to butcher a chicken properly, for next time. That is where I learned that if you try to cook it right away, rigor mortis sets in and you will end up with a very chewy bird. We ended up with a very chewy bird. A day’s rest will let the rigor pass and the meat get soft again.
3. Do not overcook. I roasted it at too high of a temperature, and cooked for too long. This, along with the rigor, made our chicken very hard to chew at first. I do know how to cook a chicken, but I usually underestimate how long it will take when meal planning, and have to add time on, and we end up eating the side dishes while the meat is still cooking because it’s taking too long. So I went overboard on the cooking, and it showed.
4. Always have someone around that is an adult. My six year old son was there, and he didn’t like the rooster so he was happy to watch – the rooster was a little threatening to him most of the time. Daniel attempted to help me pluck feathers, for a minute, and then went back to playing. Then the neighbor kids showed up, while I was in the middle of plucking and butchering, and Daniel wanted them to all go inside. Our dogs are not the friendliest (well, Atat is, but Downey is not usually) and I yelled at Daniel to make sure they all stayed outside since I was arm deep in trying to butcher a chicken without really knowing what I was doing, and had no time to try to get the dogs out of the way. My husband was at work; I should have waited for him to get home before attempting all this on my own.
5. Always have all your stuff (knives, bags, towels, etc) ready beforehand. Nothing is worse than needing to make a cut in your chicken, and you somehow got dirt on your knife, and need to run to get a clean one, but don’t want to leave the chicken outside where the flies are already waiting to dig in. Also, always make sure your kitchen is clean so that you don’t have to attempt to butcher the chicken outside.
I muddled through, and did ok. The meat tasted really good, although I did have to put it in the crockpot on low the next day so that it was a lot more tender and we could actually eat it. I also realized why dark meat is called “dark meat” and white meat is called “white meat” – it was more pronounced on this bird than on regular store-bought chicken. I don’t know if it’s like that with all home-raised chickens, or the fact that he was almost a year old, or if it was just the breed. Silver Laced Wyandottes aren’t typically a meat bird, as far as I know.
Now that I’ve done it, and done the research afterward on what I should have done the first time, I think I’m ready for when the next time comes. As I said, I know that several of my chicks are probably roosters. Of my six older chicks (the “teenagers” as my son calls them), I’m 99% sure that 5 of them are roos. I don’t know how many of the eight little chicks are roosters yet. I can’t keep them all – we’ll have to decide who to keep and who gets eaten when they are older.
I’m starting a new garden bed this year, and it is in an area where our lawn is typically very lush. I was going to do a lasagna-style (layered) garden, but I don’t have enough dirt for the top layer. The garden is going to be 10×30 feet in size. So in mid April I decided to try to cover the grass to kill it, which would make tilling it a lot easier, and prevent me from having to dig up all that grass.
I marked the corners of the bed, and then used what I had on hand – large cardboard pieces, plastic tarps, and even a big sheet of metal. I placed rocks and pieces of wood on top to hold everything down.
Here is what it looked like with all the supposedly-grass-killing coverings:
Here is the bed with tarps, cardboard, and even metal trying to cover / kill the grass.
I uncovered it all today because I’d like to start getting it ready – I have plants waiting to go in. I could tell over the last month that there were areas I’d still have to pull grass out from. I found out today that the plastic tarps acted more as a greenhouse for the grass than as a grass killer. The cardboard was the best thing – those areas are almost bare – the soil will be a lot easier to till. The metal sheet worked well also. Sheets of plywood or particle board would work as well – I found this out by accident when we left some scraps out a few weeks ago in an area where we didn’t want the grass killed.
I’m not going to be doing any tilling for a couple days, so I took the cardboard pieces and placed them over the still-very-grassy areas, in an effort to at least keep the grass from getting any bigger in those spots. Here is my bed now:
My garden bed as of today.Darn grass! Here’s one small strip I’ll have to dig up.
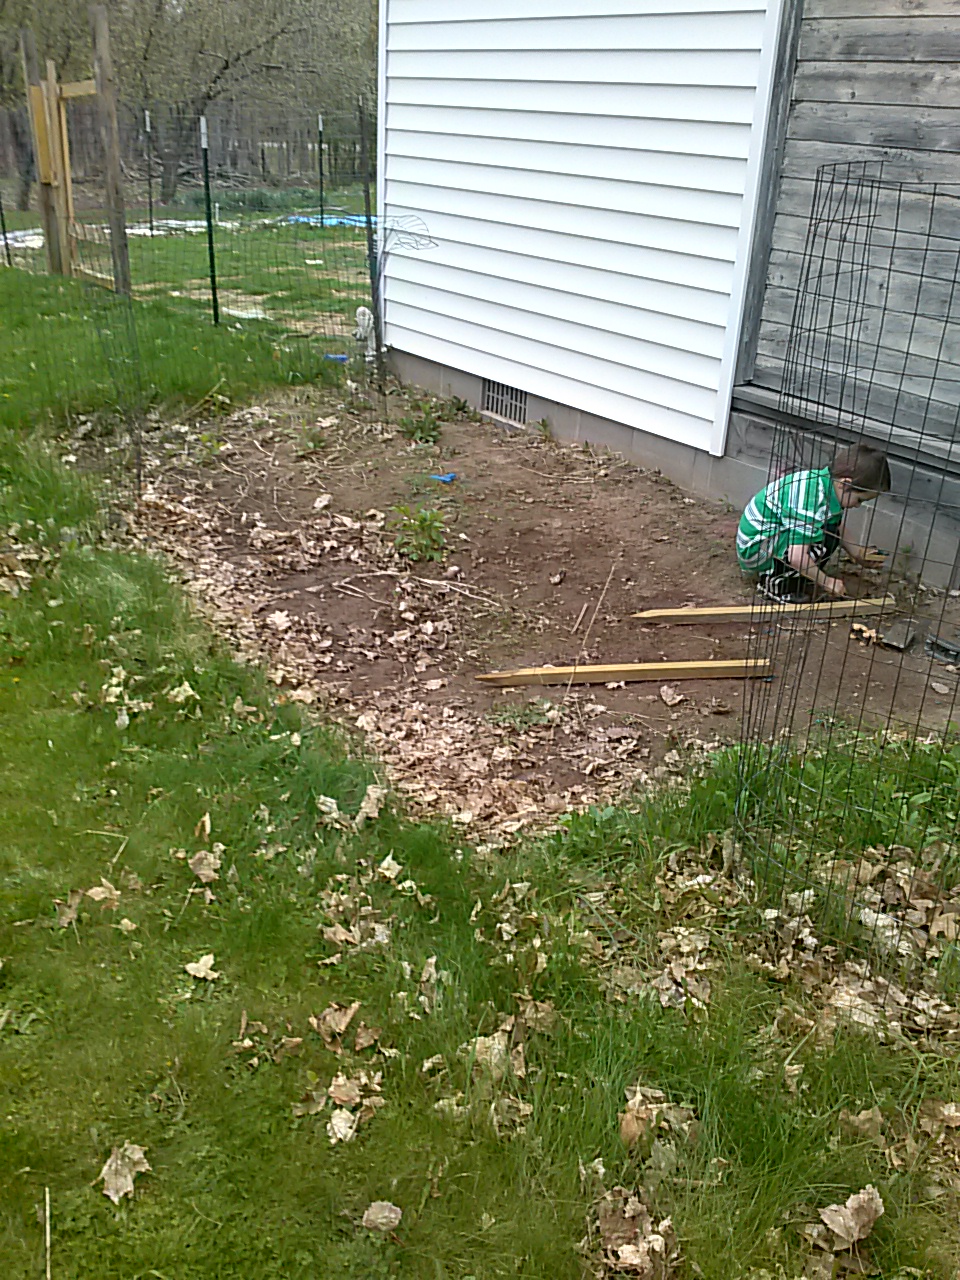
Once I get it all tilled, I will be fencing it in, and then planting! I think this little guy is excited too:
I’m still plugging away at the back garden bed from last year – there was a big section that I didn’t expand last year, that was still full of grass. I claimed that part from the lawn tonight by creating a lasagna garden. It’s a whole lot easier than trying to dig up all that grass.
I took my old cardboard chicken corral/brooder box from my older chicks, pulled it apart, and laid it over the grassy area, which was roughly 8-10 ft long x 3-4 ft. wide. The cardboard will kill the grass and any weeds. Then I threw a little dirt on top to hold the cardboard in place and to add some weight to it. I grabbed compost material and spread it around the whole cardboarded spot. Typically for a lasagna garden you layer different things – leaves, grass clippings, other materials you have on hand. My compost material was a big mix of leaves and chicken bedding, so I just put it as one large layer. That is as far as I got tonight; tomorrow I will add some dirt on top of the whole thing. It will then be ready for planting. Most of this section is planned for a bunch of strawberry plants I ordered – they should be here any day so I need this spot ready for it.
Long view of the new lasagna area with compost on top – you can see the area beyond it that I worked on last night (for info on that, see my last post – Heavy Lifting).Here’s the short view of the lasagna garden, where it comes all the way to the edge of the house. Now it’s a big rectangle behind our house so my fence will be able to be a lot neater-shaped this year.
Some other nice pics of how things are going this spring on the mini farm:
Our cherry tree is in bloom.Shot of our chicken coop across the back yard, shot from beyond the cherry tree near the tire swing.The messy tarp area in this picture is going to be my new larger garden bed. I’m attempting to kill the grass, but I may have to lasagna this bed too. I was trying to kill the grass instead because I don’t know where I will get enough dirt to cover this space. We’ll see. The fenced in area here is our dog pen.
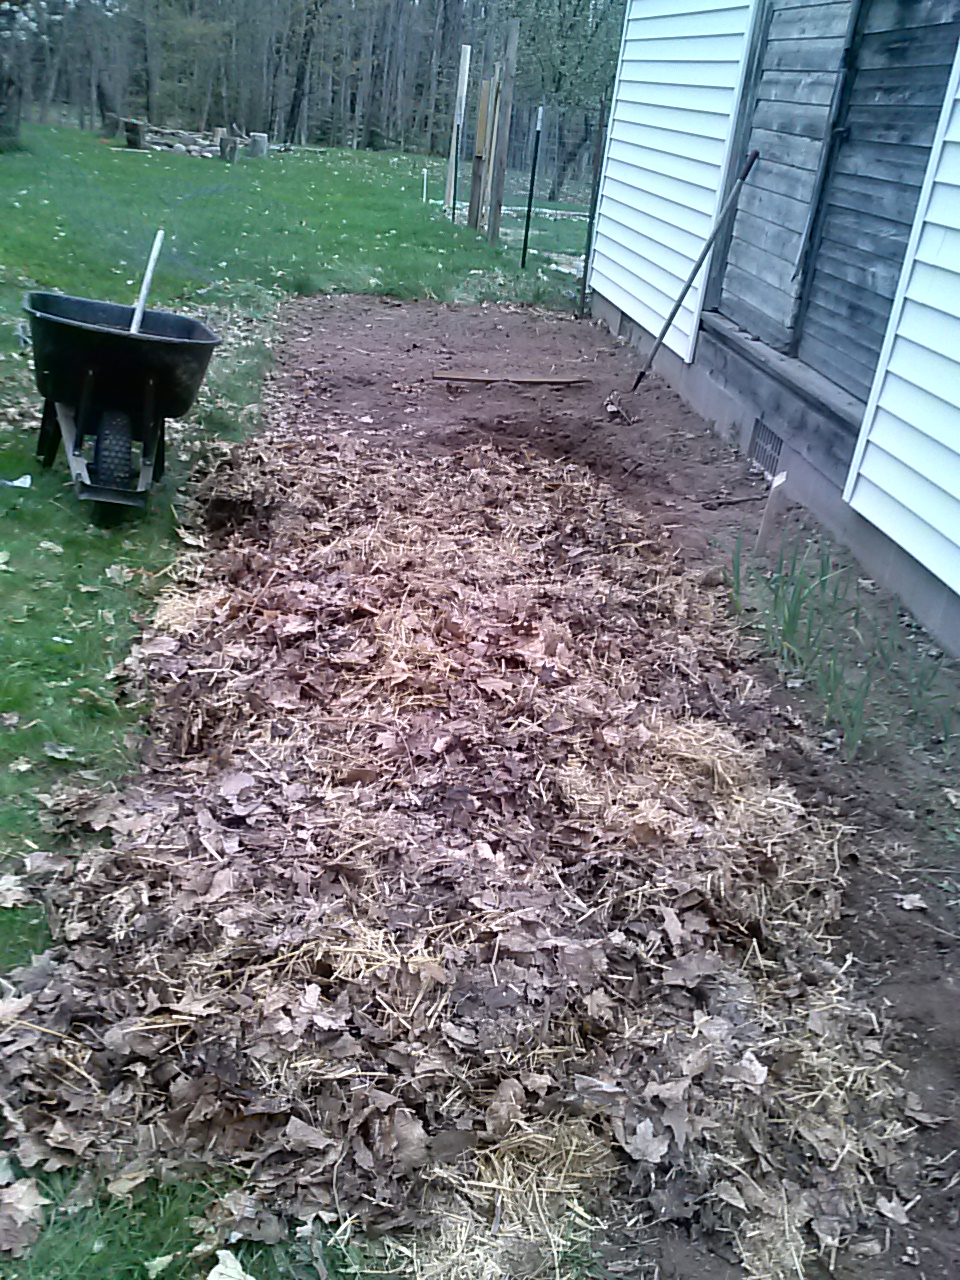
I’m working on getting the garden beds ready for this year’s plantings. Tonight after work, I wanted to start working on my old garden bed from last year, which is at the back of our house. I’ve been eying it lately, realizing I’d have some work to do to get it ready. My parents used it for several years, and then we planted in it last year, so the soil is ok, but not wonderful. I dug it a little bigger last year – it’s now about 25×6′ in most of the garden – there is a spot that is still grassy that I will tackle in the next few days. The part closest to the house is very sandy, and as you get further away it’s very clay soil with lots of rocks. I added some amendments last year – newer soil, some leaves, grass clippings, but it will probably take a few years of amending it to get it really nice.
Here’s what the back garden bed looked like before we started on it tonight.
It was pretty dry here the last few weeks, so the soil was very compacted. We got some good rain the last couple of days so I thought tonight would be a good night to try to till it, because it would be softer – I do not have a rototiller that works, so I have to do it by hand. With my trusty helper (my son Daniel) by my side, we chopped up some of the top layer of soil. My plan was to pull the weeds that were setting up in there, move the top few inches of soil, and bury some compost into it. Our compost isn’t fully composted yet, but I have a good mix of old chicken bedding/poop and leaves sitting on the compost pile that I decided to use.
Working in sections, I would move the soil we’d broken up and dump in a wheel barrow full of compost material, and then bury it. I also tried to move the sand/clay portions of dirt around so it’s more mixed together. Here is the finished section we did tonight – there’s still quite a bit of work to do since we only had time for about a 6-8 foot section tonight, but it goes pretty fast once you get the dirt broken up. It’s a lot of shoveling. I think the bed will work nicely though. I have some Kale seedlings that I need to get planted soon.
A section of the back garden that we finished layering compost material into.
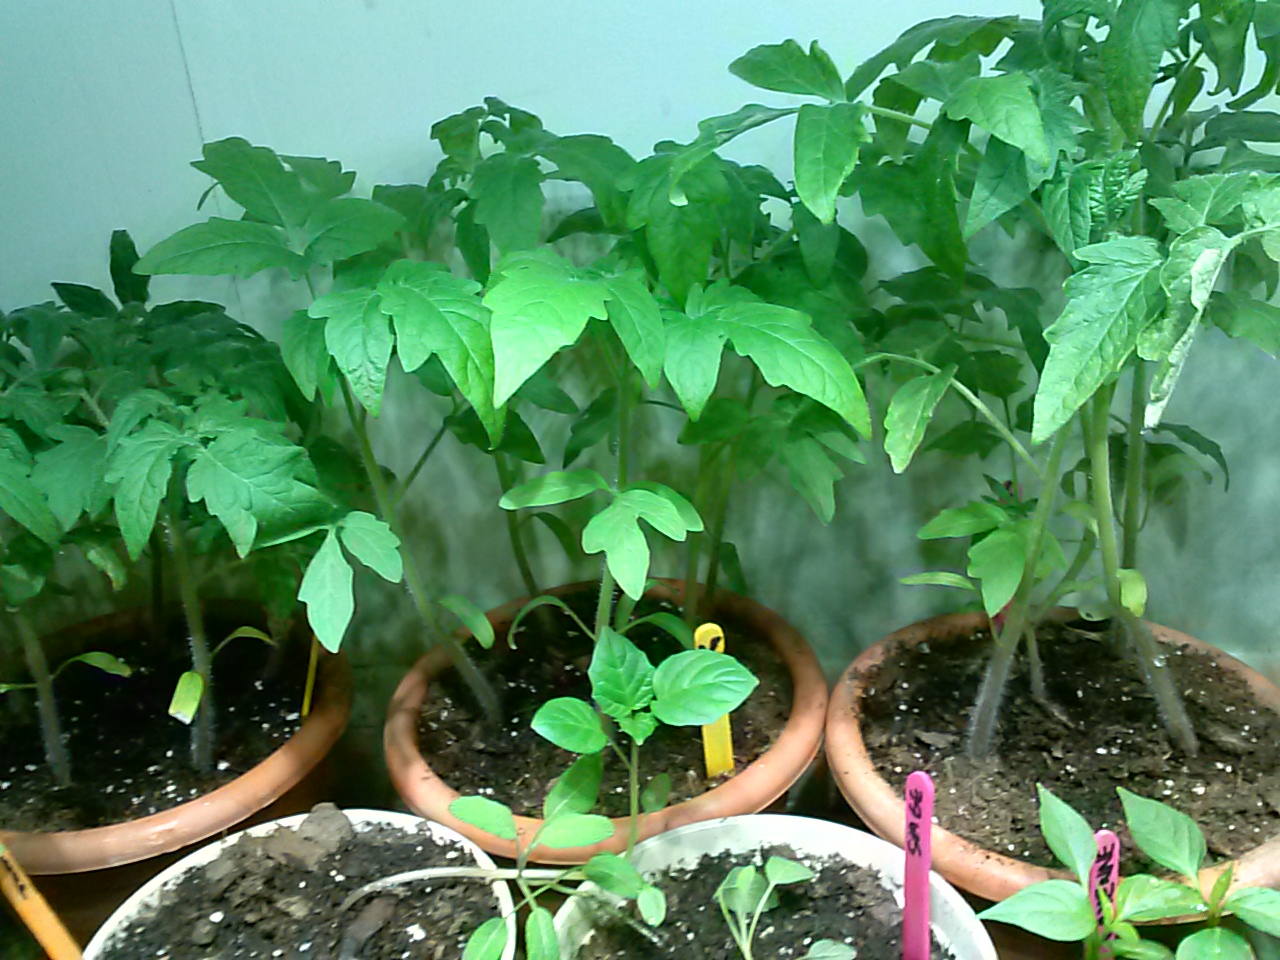
I’ve been busy getting ready for my summer garden. I have an elaborate plan for this year, and I’m starting pretty much all of this year’s plants from seed. I’m working with a staggered-out planting schedule – I started some seeds in early April, and yesterday I planted my Early-May seeds.
I had a lot of success so far with my seedlings from April. Most things did well, but I did have a couple of things not even sprout. I started some aster seeds, and none of them sprouted – I’m not sure why, except maybe my seeds were bad. They were a leftover packet from last year. I’ve usually had great success with asters, they are one of my favorite garden flowers. I love their little colorful puffballs. I usually start too many seeds on purpose, just because sometimes you get some that don’t sprout – i.e. I planted 6 tomato seeds but really want 4 plants. My tomatoes are growing well, I planted three different kinds, I ended up with 5 plants of two kinds, and six plants of the other. Most of the April seedlings are now replanted into pots – they got too big for their original peat pellets.
I only have one spot to start seeds inside, a table in a south-facing window that’s about 5 feet x 2 feet, with a grow light hanging overhead. I needed that whole space for this new Early May batch. Which meant that I had to figure out what to do with my older seedlings. I can’t put them outside yet. But I do have another grow light. I devised a plan: To hang the extra grow light underneath the table, and put the older potted seedlings below that. Here is my new setup:
Here are my under-table seedlings.
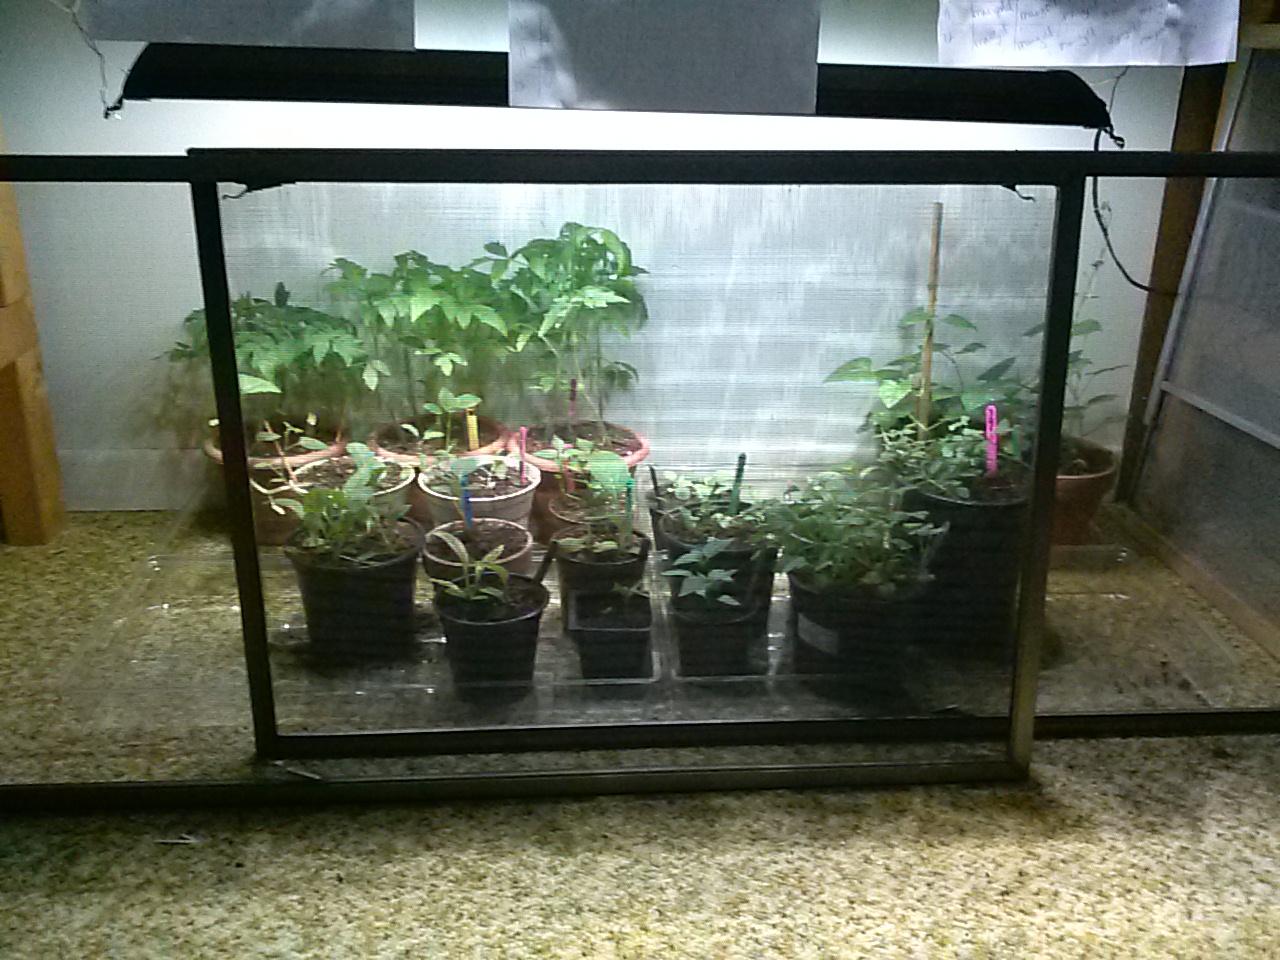
I also have a cat that likes to eat plants – I found this out while potting some of these up – he came up and started chowing down on some. We have some extra window screens in our bedroom that aren’t in the windows currently, so I used them to block his access:
My setup with the screens in place.
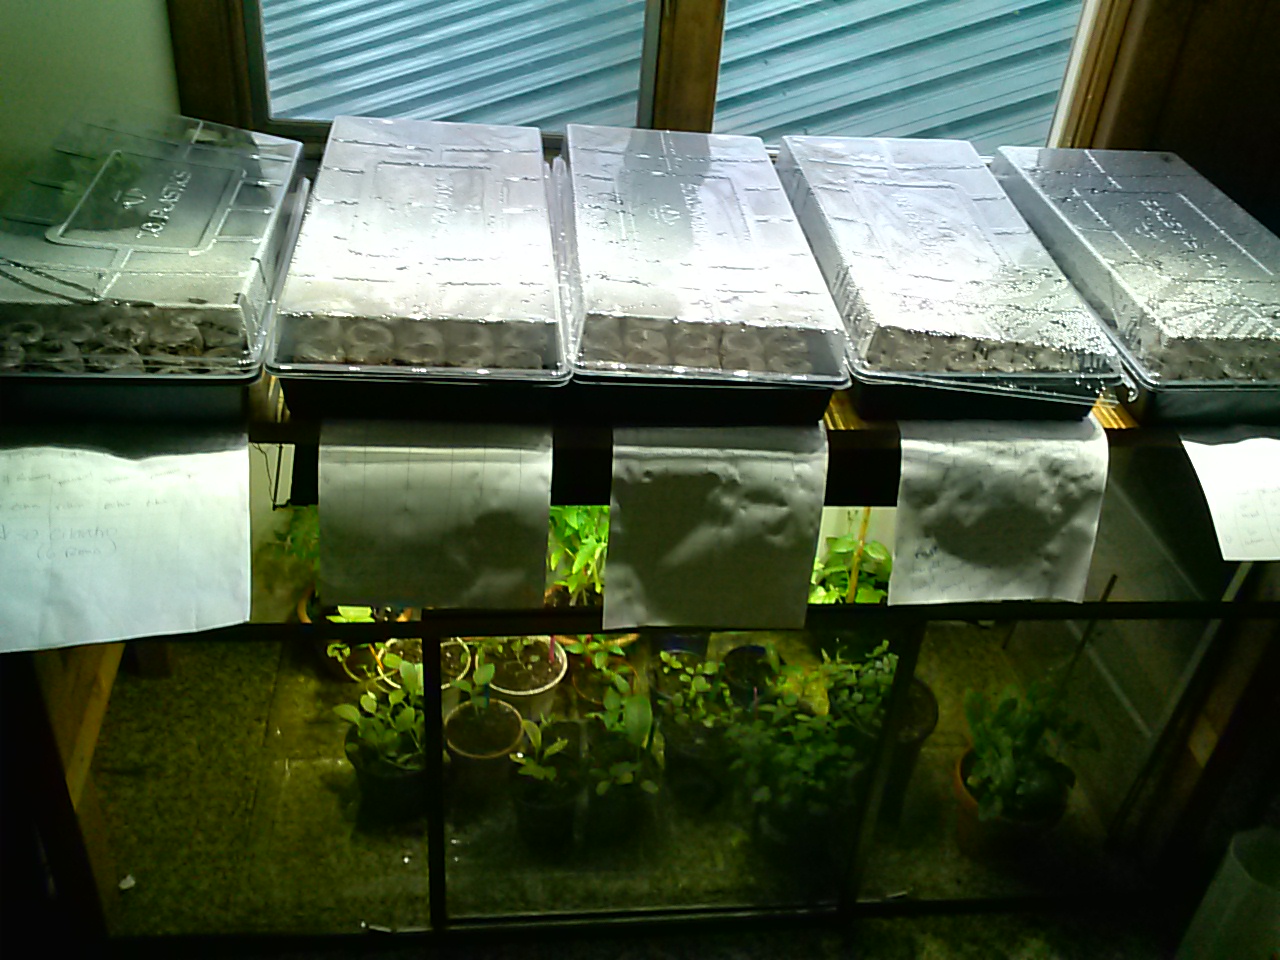
In the pictures, the sheets of paper hanging down below the seed trays on the table are my charts of seeds in the trays – otherwise I could end up lost with mystery plants. Some things I would recognize, but I’m trying a lot of new plants this year, so I need a map.
Here is the whole setup:
My seed starting setup.
I have a few small seedlings that are still small enough for their peat pellets, so they are sharing the far left tray with some new seeds – about half the tray is seedlings, half is seeds.
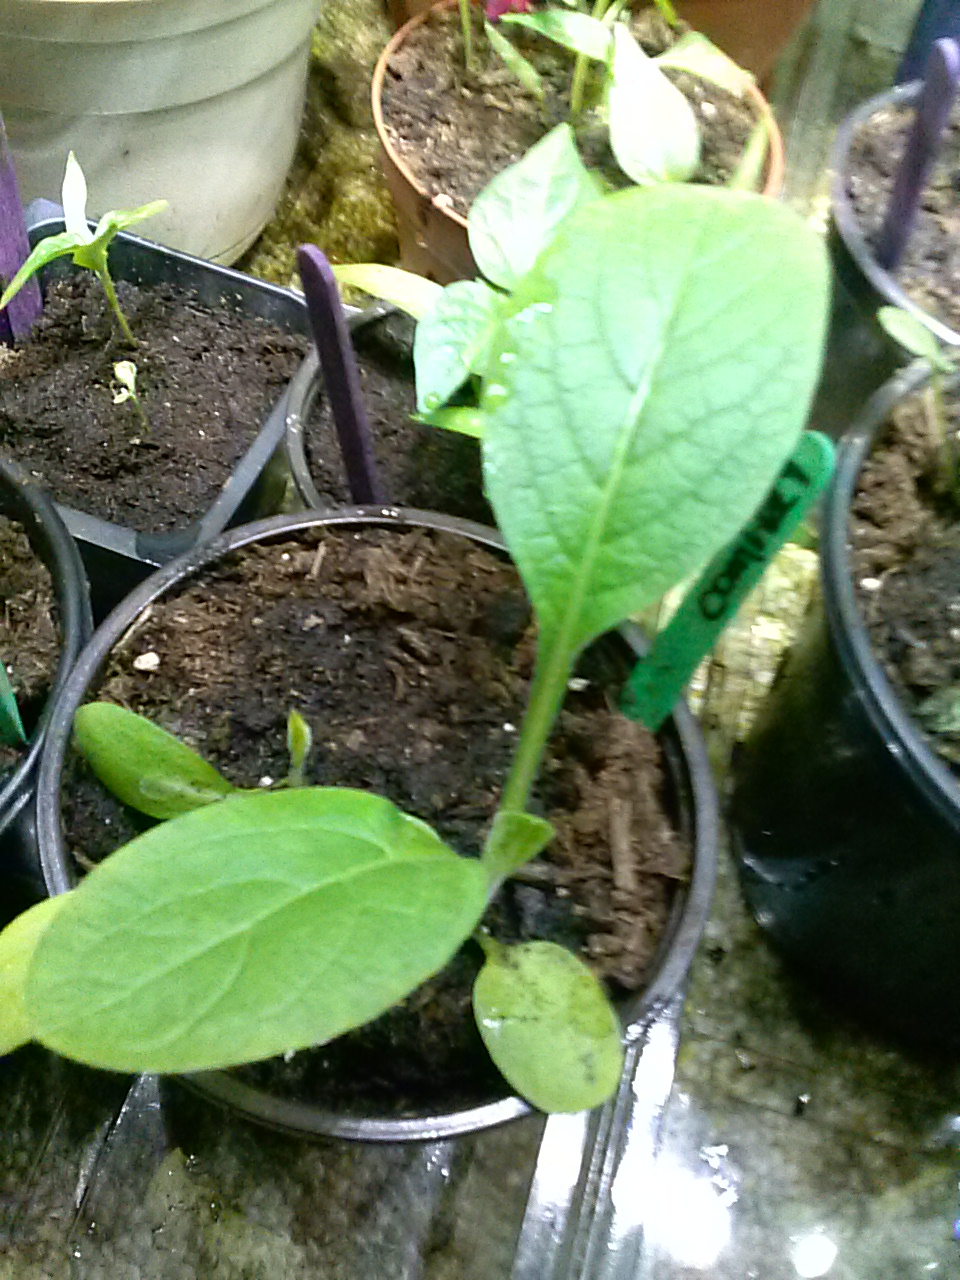
Here are some of my little guys close up:
Tomato pots – I have 5 plants in each pot for now – they are small so they can share space.Comfrey – this is a new plant for me, I’m excited to see how it does.Black Eyed Susan Thunbergia – a vine with little orange & black flowers. This is a new one for me as well – I had to give it a trellis, and separate it from everyone else – they were trying to climb my tomatoes and even the cord for the grow-light.
I love plants, they are a ton of fun to grow. I just hope that nobody gets too big before I can get them outside – their beds won’t be ready till probably the end of May. Plus it may be too cold before then – my plan is to get them outside over Memorial day weekend. We’ll see how the weather is. I got a mini pop-up greenhouse I can put them in later this month. I plan to harden them off out in that before actually putting them all in the ground.
Our maple syrup making adventure is over for the year – It’s still prime collection season but we were having trouble cooking it all up inside the house. We have a propane-gas stove, and propane is not cheap. Plus I just didn’t like leaving it cooking for so long at a time. Next year I will need to figure out a way to boil it outside, preferably using some kind of wood burning set up. The collection bags weren’t the best option either, but they did the job. I ended up using large sticks to weigh them down so they wouldn’t get out of place. My sister Diane, commenting on my last post, told me about our parents using old milk jugs to collect the sap, which I still don’t remember. I’m older so I don’t know how she remembers these things better than I do. So next year, instead of using flimsy sap bags, or expensive buckets, I will use old milk jugs. For a couple weeks of collecting and boiling, we did pretty well in my opinion. Considering that the sap to syrup ratio is about 40:1, I think we got enough for this year:
My syrup in a quart jar
The Mushroom kits I’ve been growing have done somewhat well – It’s possible we just don’t have the moisture in our kitchen that they needed, but I was expecting a little more at one time. The oyster mushrooms only gave us a few mushrooms for their first flush. The pom pom blanc, which were supposed to taste like crab meat, were not as good as I hoped. The mushroom clump doubled in size since my last post, and I wasn’t really sure when I should harvest them – they started to look like the pictures you see online of them – with some little tendrils (kind of like a lion’s mane) – so I thought that was the right time to pick them. I cooked it up in a little butter, so as to not drown out the flavor, but I was unimpressed. The shiitake are doing well, here is the large mushroom that is currently growing:
Our Shiitake mushroom growing out of its log
There are little baby mushrooms on the right side of the log, and in the picture above, I think the white webby-looking stuff on the bottom may be another cap forming – it has a similar appearance to the cap of the large mushroom, but it hasn’t actually popped out of the log yet, so I can’t really be sure. I’m very excited to eat the shiitake mushrooms, since I know I like them. The oyster mushrooms were very good too, we just didn’t get a lot. I have the oyster and pom pom blanc logs drying for now, and in a month or two I will try to start them again – you are supposed to be able to get a few flushes.
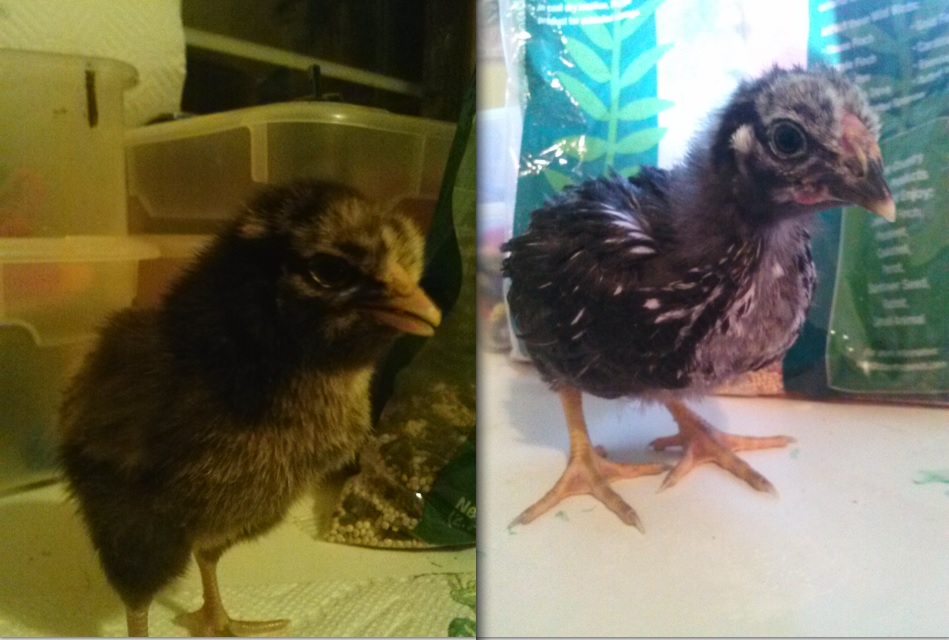
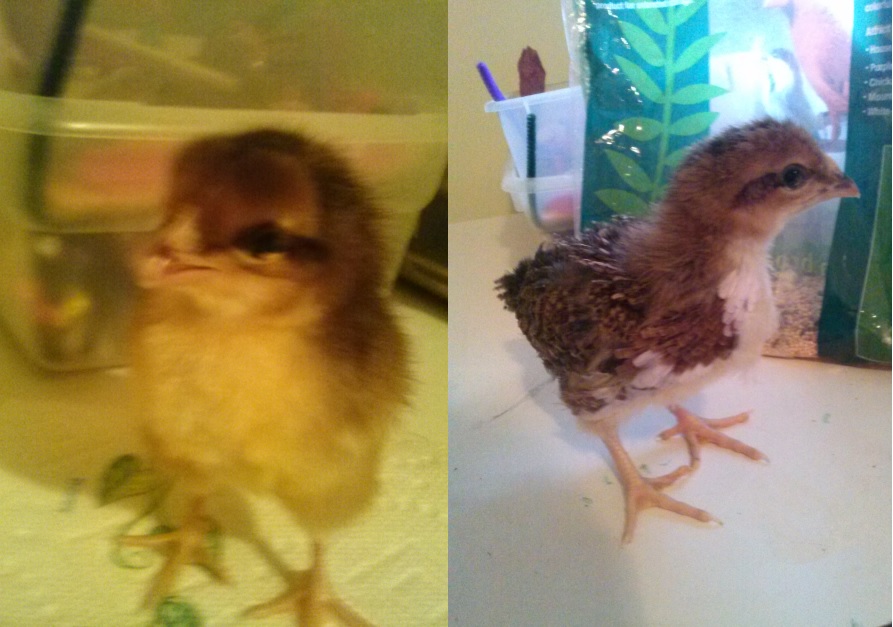
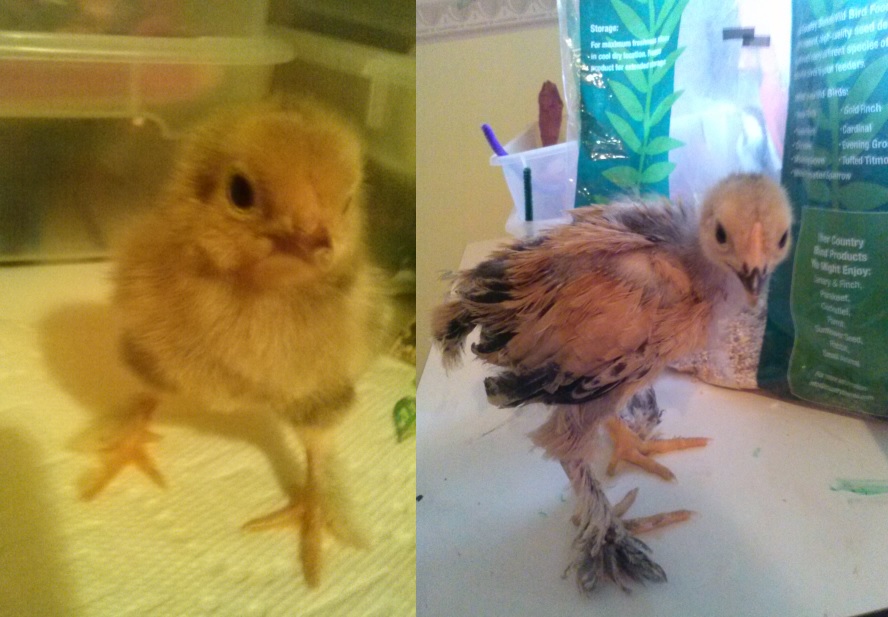
Our six little chicks are growing up. They have changed a whole lot in their three weeks of life. I’m really excited to see their coloring change – some have changed in unexpected ways. I’m sure they will change a lot more as they grow up too. I’ll have to wait to see what kind of chickens they are (and what gender they are) until they are almost or fully adults. Here are their updates, along with pictures of when I first got them, so you can see the difference three weeks makes.
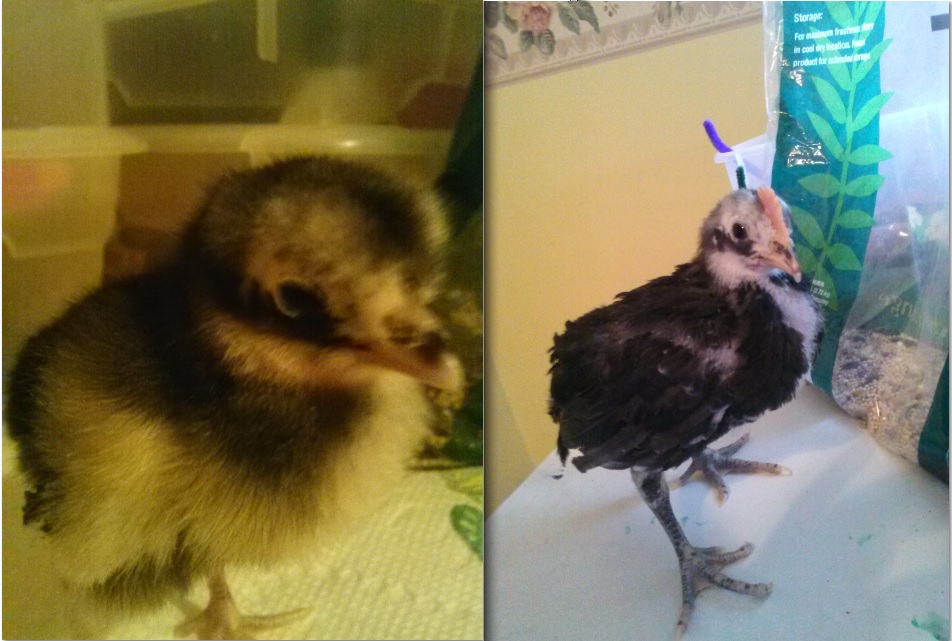
I thought this guy would end up being all white, but he is getting some black in her/his feathers, and also now has a black spot on his beak.Here’s our little black chick, starting to get more white in his coloring.This little guy already has a comb, which may mean he’s a rooster. Combs can be deceiving though. He looks like he’s wearing a vest from the front now, and his legs are dark and splotchy – I’m wondering if he’s some kind of Maran (copper maran or other). That is just a wild guess though.Our little orange chick – now getting some brown in her feathers.Little mask face – now has brown/black speckles in her feathers, so I think she/he will be a speckled chicken. But it’s really too early to tell for sure – they may change a lot before adulthood.Here’s the feather booted, strong-will-to-live chick. As you can see the feathers on her legs are getting really fluffy. I really like how they look. Her coloring is really nice too – she’s getting some black in her feathers, and a small comb is forming.
I’m really enjoying watching them grow. I will be getting the replacements for their fallen brethren around April 20th, so I will have even more chicks to watch grow up at that point. Some day my spare bedroom will stop being a chicken nursery. Until then, this is pretty fun.