I’m starting a new garden bed this year, and it is in an area where our lawn is typically very lush. I was going to do a lasagna-style (layered) garden, but I don’t have enough dirt for the top layer. The garden is going to be 10×30 feet in size. So in mid April I decided to try to cover the grass to kill it, which would make tilling it a lot easier, and prevent me from having to dig up all that grass.
I marked the corners of the bed, and then used what I had on hand – large cardboard pieces, plastic tarps, and even a big sheet of metal. I placed rocks and pieces of wood on top to hold everything down.
Here is what it looked like with all the supposedly-grass-killing coverings:
Here is the bed with tarps, cardboard, and even metal trying to cover / kill the grass.
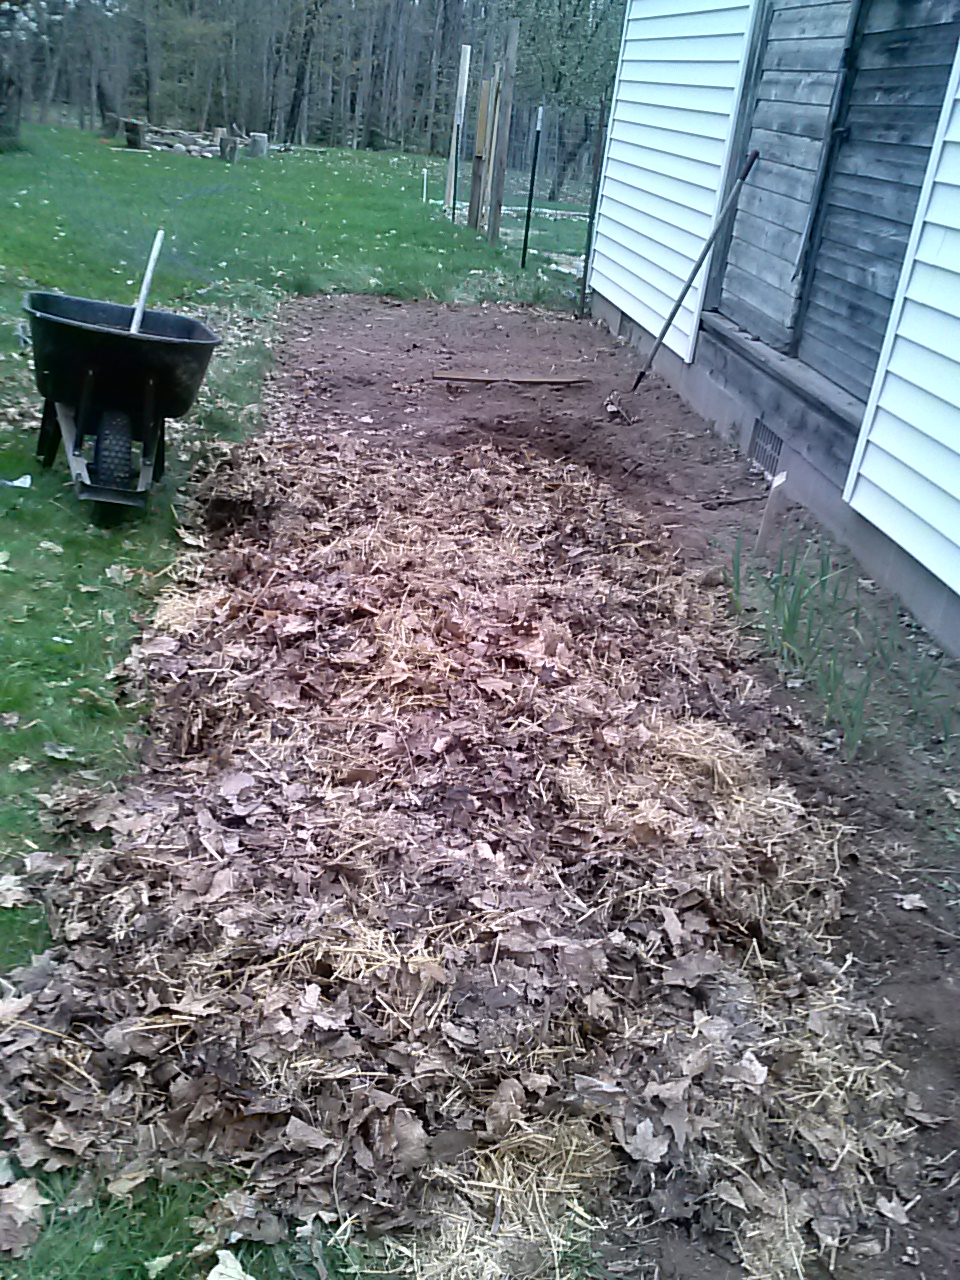
I uncovered it all today because I’d like to start getting it ready – I have plants waiting to go in. I could tell over the last month that there were areas I’d still have to pull grass out from. I found out today that the plastic tarps acted more as a greenhouse for the grass than as a grass killer. The cardboard was the best thing – those areas are almost bare – the soil will be a lot easier to till. The metal sheet worked well also. Sheets of plywood or particle board would work as well – I found this out by accident when we left some scraps out a few weeks ago in an area where we didn’t want the grass killed.
I’m not going to be doing any tilling for a couple days, so I took the cardboard pieces and placed them over the still-very-grassy areas, in an effort to at least keep the grass from getting any bigger in those spots. Here is my bed now:
My garden bed as of today.Darn grass! Here’s one small strip I’ll have to dig up.
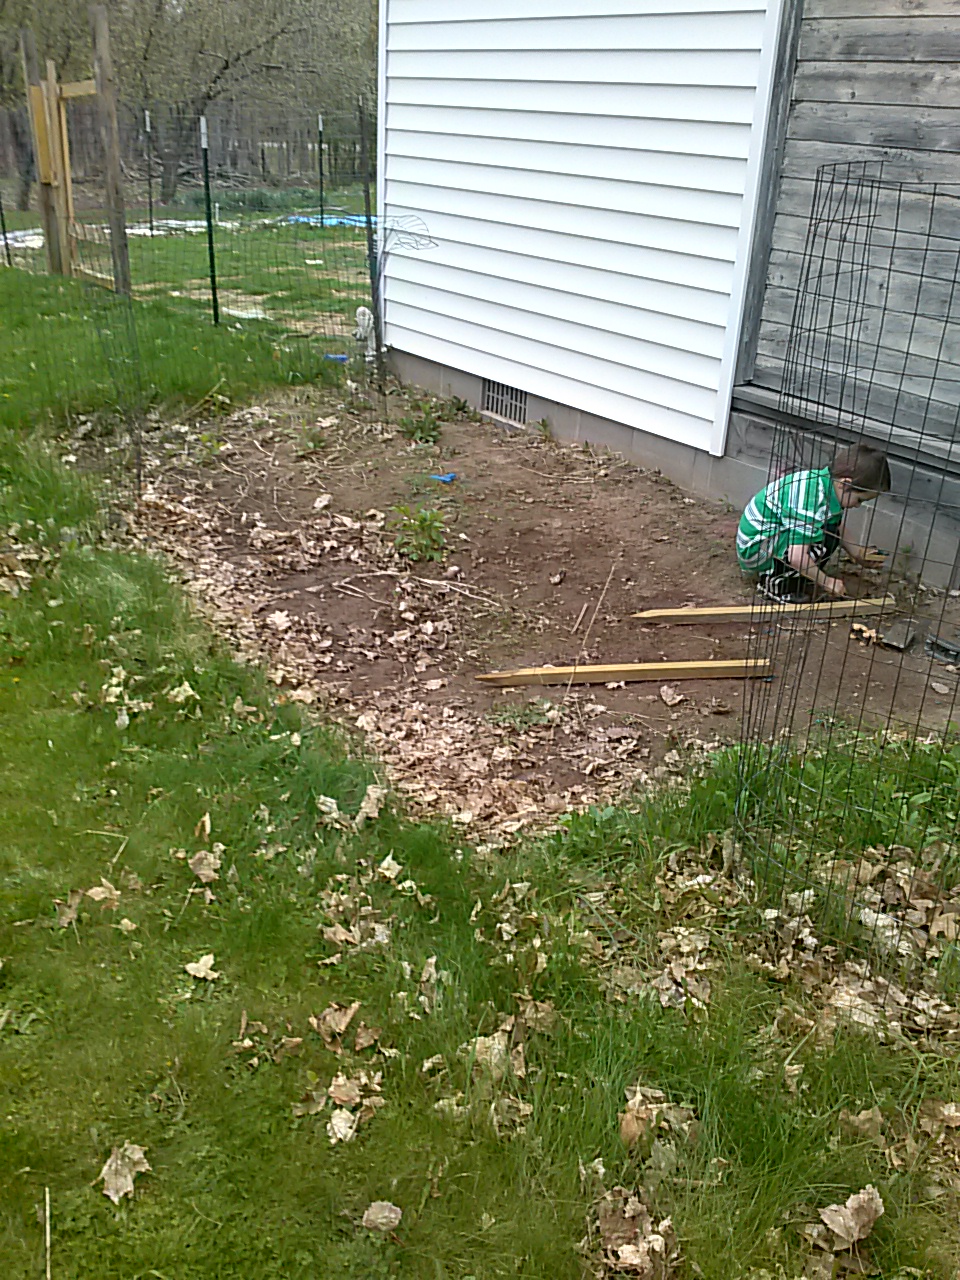
Once I get it all tilled, I will be fencing it in, and then planting! I think this little guy is excited too:
I’m still plugging away at the back garden bed from last year – there was a big section that I didn’t expand last year, that was still full of grass. I claimed that part from the lawn tonight by creating a lasagna garden. It’s a whole lot easier than trying to dig up all that grass.
I took my old cardboard chicken corral/brooder box from my older chicks, pulled it apart, and laid it over the grassy area, which was roughly 8-10 ft long x 3-4 ft. wide. The cardboard will kill the grass and any weeds. Then I threw a little dirt on top to hold the cardboard in place and to add some weight to it. I grabbed compost material and spread it around the whole cardboarded spot. Typically for a lasagna garden you layer different things – leaves, grass clippings, other materials you have on hand. My compost material was a big mix of leaves and chicken bedding, so I just put it as one large layer. That is as far as I got tonight; tomorrow I will add some dirt on top of the whole thing. It will then be ready for planting. Most of this section is planned for a bunch of strawberry plants I ordered – they should be here any day so I need this spot ready for it.
Long view of the new lasagna area with compost on top – you can see the area beyond it that I worked on last night (for info on that, see my last post – Heavy Lifting).Here’s the short view of the lasagna garden, where it comes all the way to the edge of the house. Now it’s a big rectangle behind our house so my fence will be able to be a lot neater-shaped this year.
Some other nice pics of how things are going this spring on the mini farm:
Our cherry tree is in bloom.Shot of our chicken coop across the back yard, shot from beyond the cherry tree near the tire swing.The messy tarp area in this picture is going to be my new larger garden bed. I’m attempting to kill the grass, but I may have to lasagna this bed too. I was trying to kill the grass instead because I don’t know where I will get enough dirt to cover this space. We’ll see. The fenced in area here is our dog pen.
I’m working on getting the garden beds ready for this year’s plantings. Tonight after work, I wanted to start working on my old garden bed from last year, which is at the back of our house. I’ve been eying it lately, realizing I’d have some work to do to get it ready. My parents used it for several years, and then we planted in it last year, so the soil is ok, but not wonderful. I dug it a little bigger last year – it’s now about 25×6′ in most of the garden – there is a spot that is still grassy that I will tackle in the next few days. The part closest to the house is very sandy, and as you get further away it’s very clay soil with lots of rocks. I added some amendments last year – newer soil, some leaves, grass clippings, but it will probably take a few years of amending it to get it really nice.
Here’s what the back garden bed looked like before we started on it tonight.
It was pretty dry here the last few weeks, so the soil was very compacted. We got some good rain the last couple of days so I thought tonight would be a good night to try to till it, because it would be softer – I do not have a rototiller that works, so I have to do it by hand. With my trusty helper (my son Daniel) by my side, we chopped up some of the top layer of soil. My plan was to pull the weeds that were setting up in there, move the top few inches of soil, and bury some compost into it. Our compost isn’t fully composted yet, but I have a good mix of old chicken bedding/poop and leaves sitting on the compost pile that I decided to use.
Working in sections, I would move the soil we’d broken up and dump in a wheel barrow full of compost material, and then bury it. I also tried to move the sand/clay portions of dirt around so it’s more mixed together. Here is the finished section we did tonight – there’s still quite a bit of work to do since we only had time for about a 6-8 foot section tonight, but it goes pretty fast once you get the dirt broken up. It’s a lot of shoveling. I think the bed will work nicely though. I have some Kale seedlings that I need to get planted soon.
A section of the back garden that we finished layering compost material into.
I’ve been busy getting ready for my summer garden. I have an elaborate plan for this year, and I’m starting pretty much all of this year’s plants from seed. I’m working with a staggered-out planting schedule – I started some seeds in early April, and yesterday I planted my Early-May seeds.
I had a lot of success so far with my seedlings from April. Most things did well, but I did have a couple of things not even sprout. I started some aster seeds, and none of them sprouted – I’m not sure why, except maybe my seeds were bad. They were a leftover packet from last year. I’ve usually had great success with asters, they are one of my favorite garden flowers. I love their little colorful puffballs. I usually start too many seeds on purpose, just because sometimes you get some that don’t sprout – i.e. I planted 6 tomato seeds but really want 4 plants. My tomatoes are growing well, I planted three different kinds, I ended up with 5 plants of two kinds, and six plants of the other. Most of the April seedlings are now replanted into pots – they got too big for their original peat pellets.
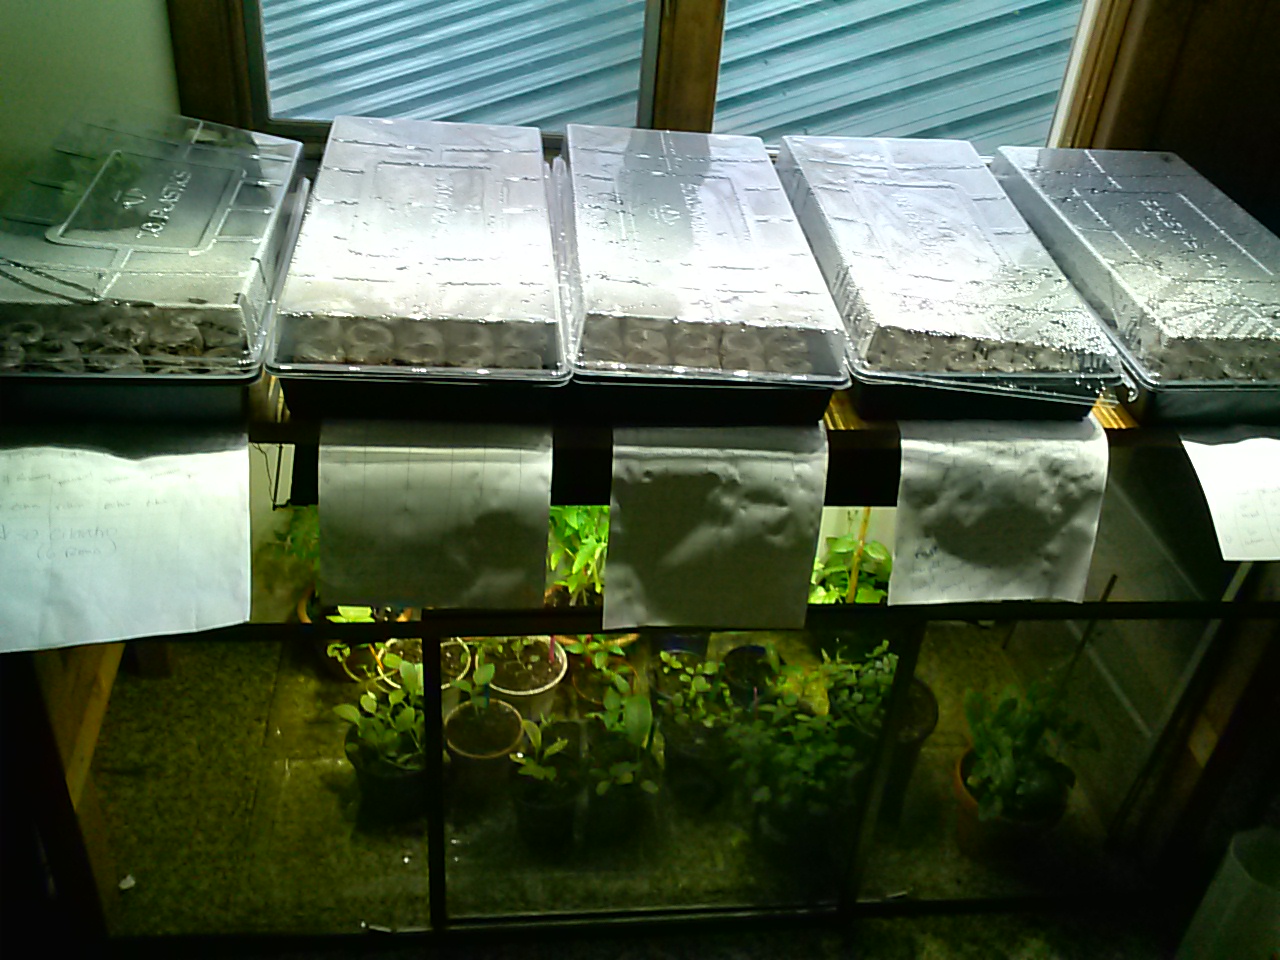
I only have one spot to start seeds inside, a table in a south-facing window that’s about 5 feet x 2 feet, with a grow light hanging overhead. I needed that whole space for this new Early May batch. Which meant that I had to figure out what to do with my older seedlings. I can’t put them outside yet. But I do have another grow light. I devised a plan: To hang the extra grow light underneath the table, and put the older potted seedlings below that. Here is my new setup:
Here are my under-table seedlings.
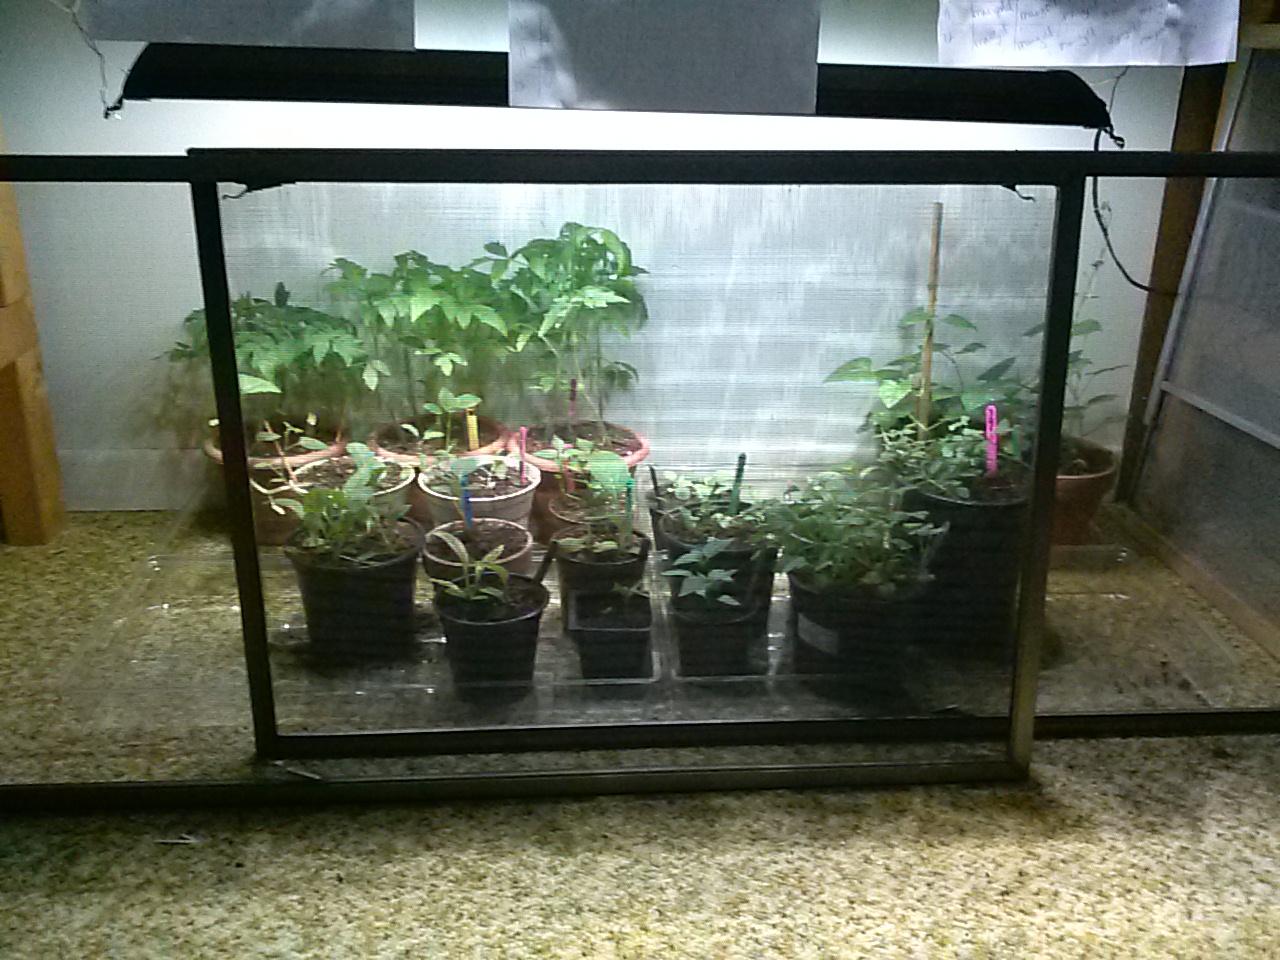
I also have a cat that likes to eat plants – I found this out while potting some of these up – he came up and started chowing down on some. We have some extra window screens in our bedroom that aren’t in the windows currently, so I used them to block his access:
My setup with the screens in place.
In the pictures, the sheets of paper hanging down below the seed trays on the table are my charts of seeds in the trays – otherwise I could end up lost with mystery plants. Some things I would recognize, but I’m trying a lot of new plants this year, so I need a map.
Here is the whole setup:
My seed starting setup.
I have a few small seedlings that are still small enough for their peat pellets, so they are sharing the far left tray with some new seeds – about half the tray is seedlings, half is seeds.
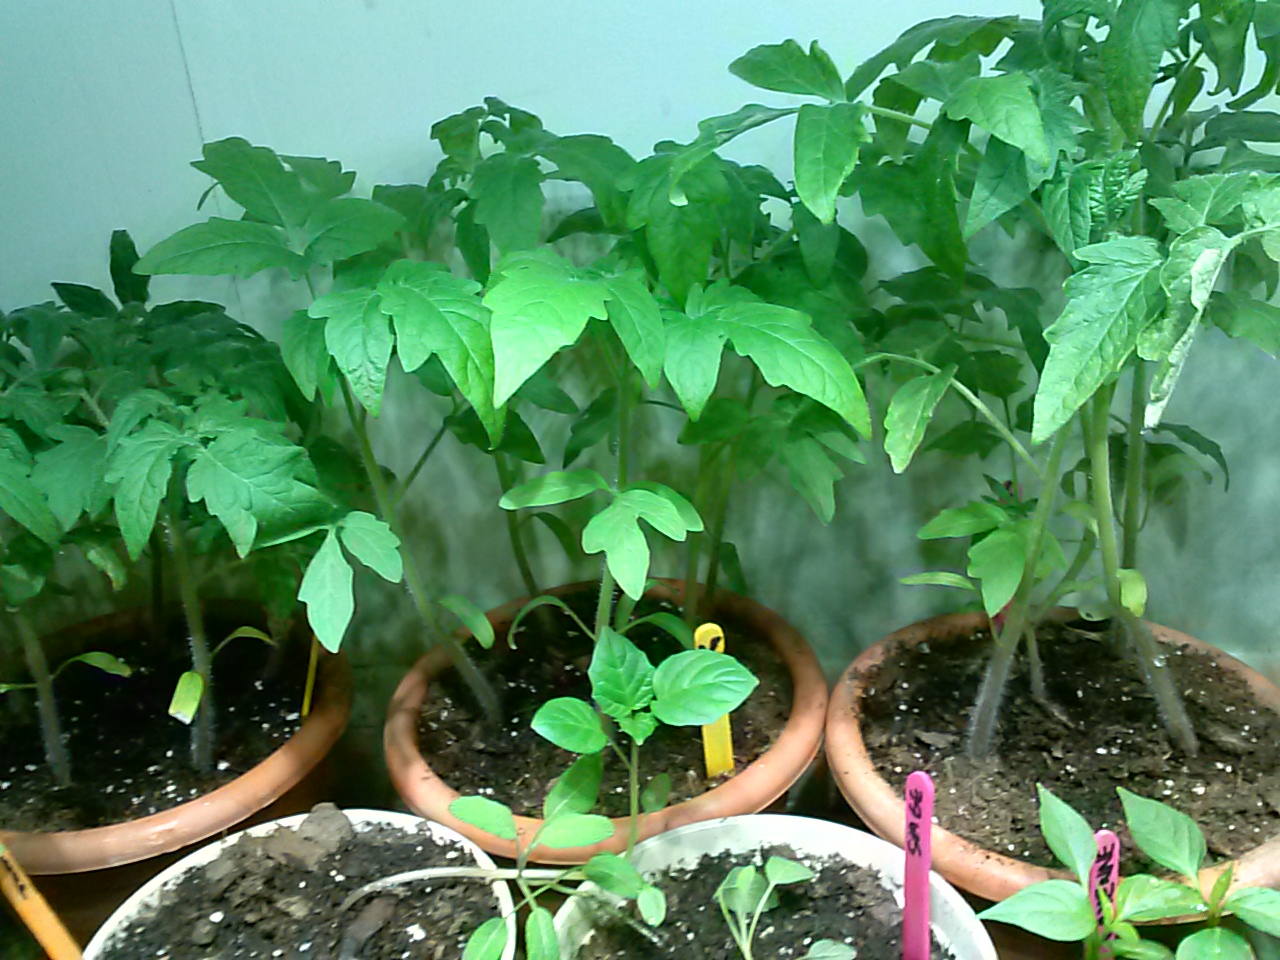
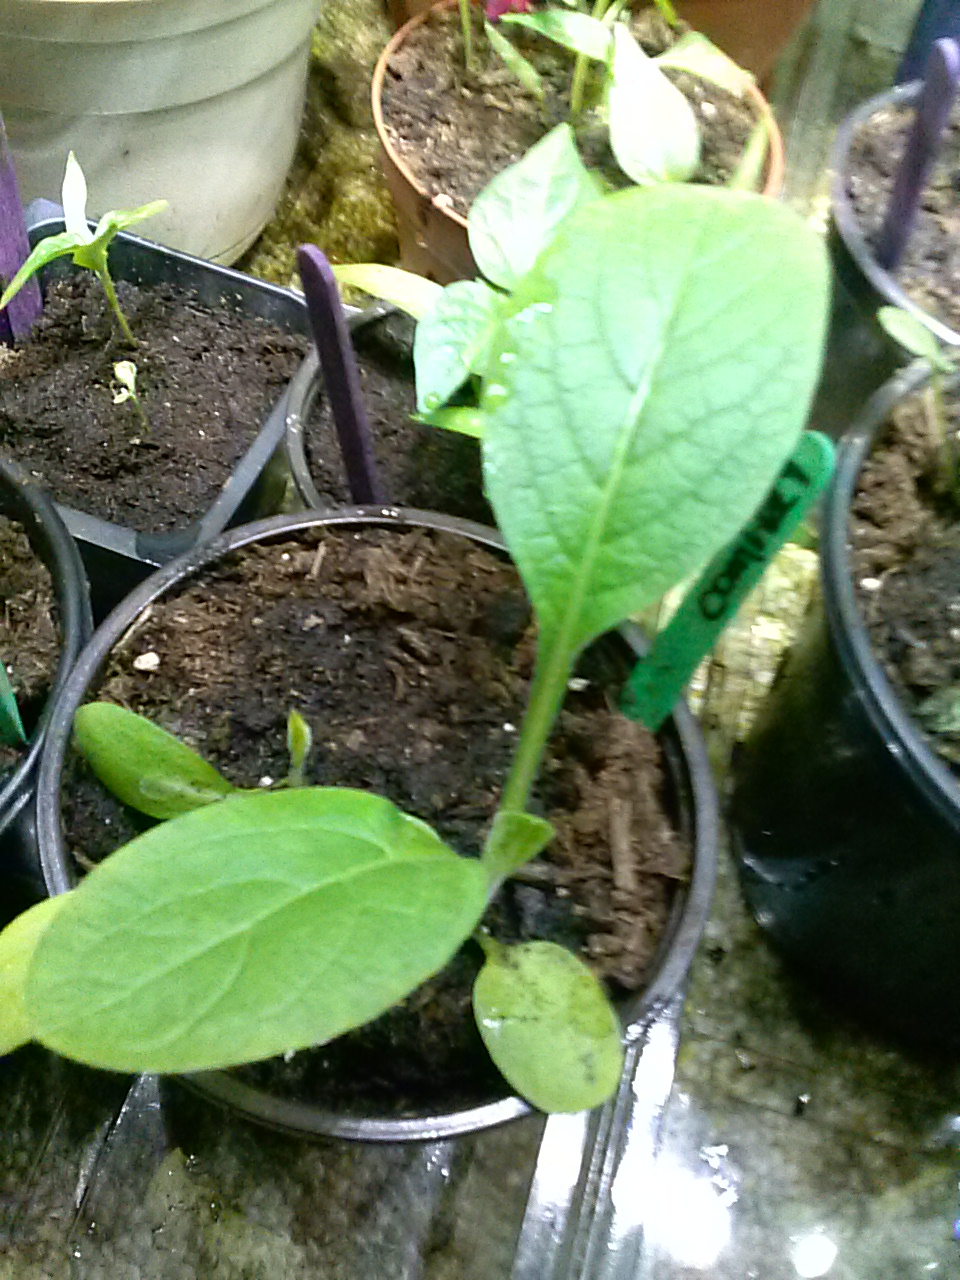
Here are some of my little guys close up:
Tomato pots – I have 5 plants in each pot for now – they are small so they can share space.Comfrey – this is a new plant for me, I’m excited to see how it does.Black Eyed Susan Thunbergia – a vine with little orange & black flowers. This is a new one for me as well – I had to give it a trellis, and separate it from everyone else – they were trying to climb my tomatoes and even the cord for the grow-light.
I love plants, they are a ton of fun to grow. I just hope that nobody gets too big before I can get them outside – their beds won’t be ready till probably the end of May. Plus it may be too cold before then – my plan is to get them outside over Memorial day weekend. We’ll see how the weather is. I got a mini pop-up greenhouse I can put them in later this month. I plan to harden them off out in that before actually putting them all in the ground.
My seeds are sprouting! Its exciting. I have them in the seed trays and keep the domes on most of the day, taking them off for a couple hours, just to keep the moisture from being too much – I don’t want any mold to form. They are in a sunny window and also have a grow light.
My tomato seedlings
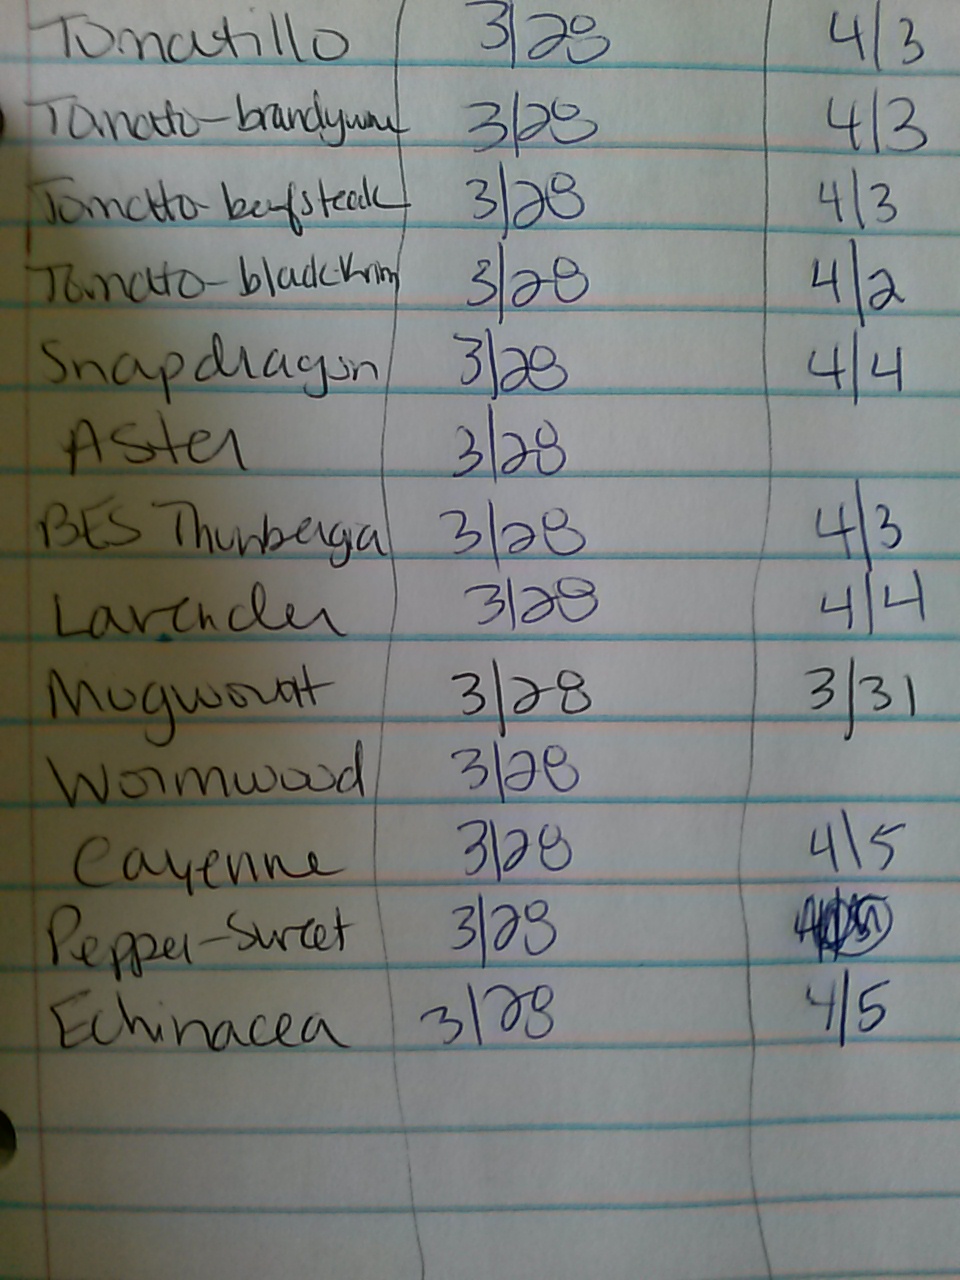
I’ve got charts for each seed tray, so that I know which plants are which. I have noticed that the strong sunlight coming through the window attracts them a little more than the grow light above, so the tomatoes have been “reaching” for the sun. I have been turning the peat pellets instead of the trays, just so I don’t get lost in my grid of seedlings, and forget what is where. I also decided to try to keep track of germination, or at least how long each kind of plant takes to germinate. Here’s my chart for this round of seedlings:
My germination chart
I just marked down the date I planted the seeds, and the first date I saw sprouts. It will be helpful in later years in case I come across a batch of bad or old seeds or something.
Most of our snow is now gone also, so I’ve been thinking about how best to start the new garden beds. I’m going to need some cardboard so I can do a lasagna-style garden. It’s a lot easier than digging up grass. Lasagna-style gardening is where you first layer paper (cardboard, newspaper, or paper bags) over the grass, and then layer compost, leaves, and soil to make a garden bed. The compost-type things break down under the growing plants, and the first layer of cardboard/paper keeps the grass and other weeds from growing up into the bed. You end up with a really nice rich soil.
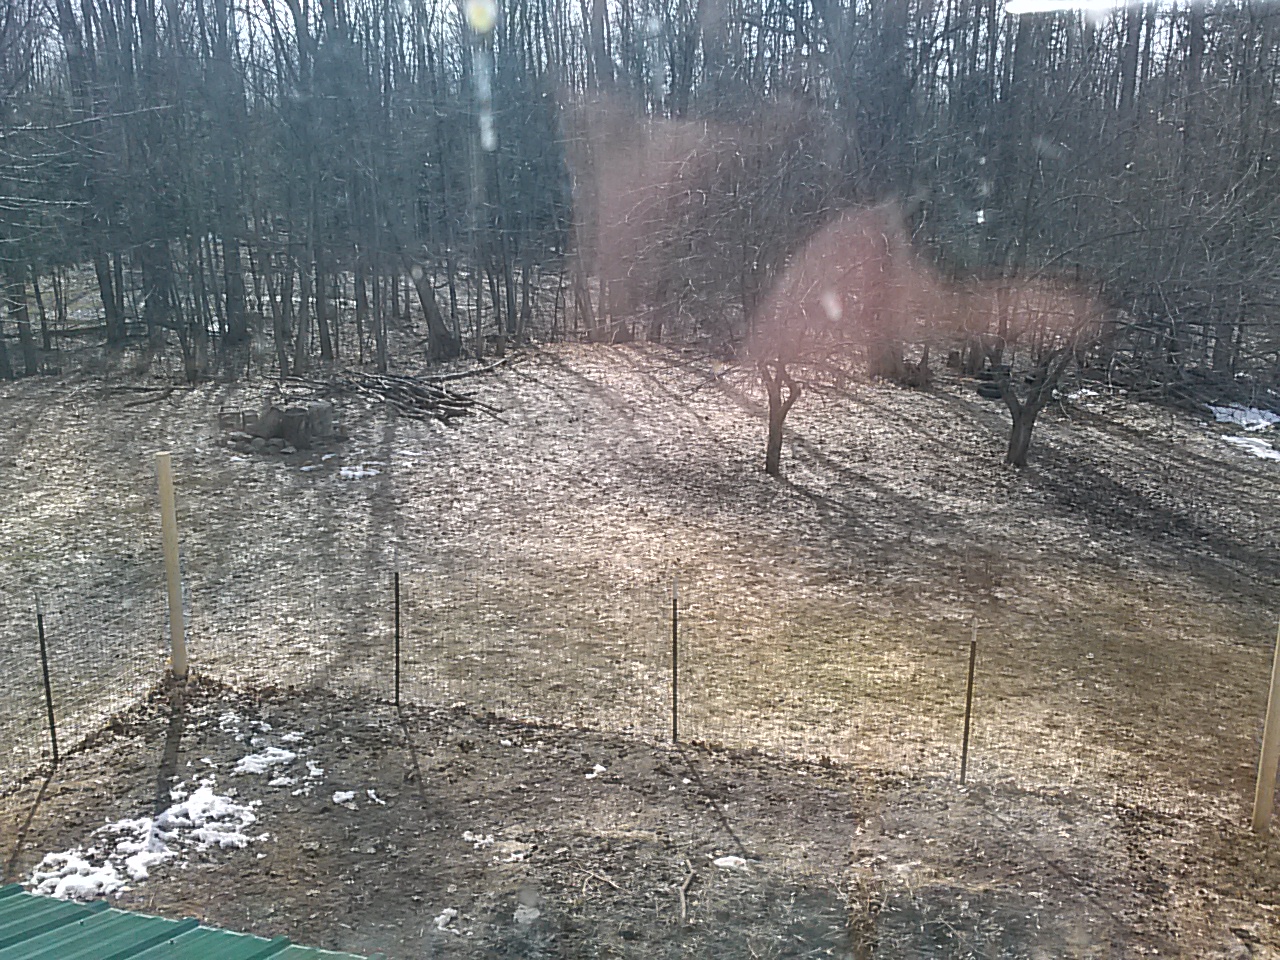
Here is part of my yard, almost completely snow free as of today!
Our snowless (mostly) side yard
I took this picture out our upstairs window. In the foreground, the fenced bit is our dog run. There is a bit of snow still in the dog run area, and a tiny bit near the woods. My new main garden will be adjoined to the long edge of the dog fence in this picture.
I planned out my garden a while back, and I’ve been waiting to start planting. I have a pretty elaborate garden planned for this year, so I have a ton of seeds that I’ll need to start. I’m hoping to get everything into the ground at the very end of May. Two weeks ago, I figured out what needs to get started when, and separated them out into 4 groups – Start in April, Start in May (beginning), Start in Mid-May, and Direct-Sow. These are based on how quickly the seeds will germinate/grow large enough for outside. These groups were put into quart size plastic bags, since each group had quite a few seed packets in it. The day I sorted everything, I realized there were some seeds that needed to be put in the fridge for awhile, which meant they should go into the fridge THAT day. So that day I started some Comfrey and Datura and some other things. The cold of the fridge isn’t completely necessary but can help the seeds germinate. Those will come out of the fridge on April 12th and get put into their window spot.
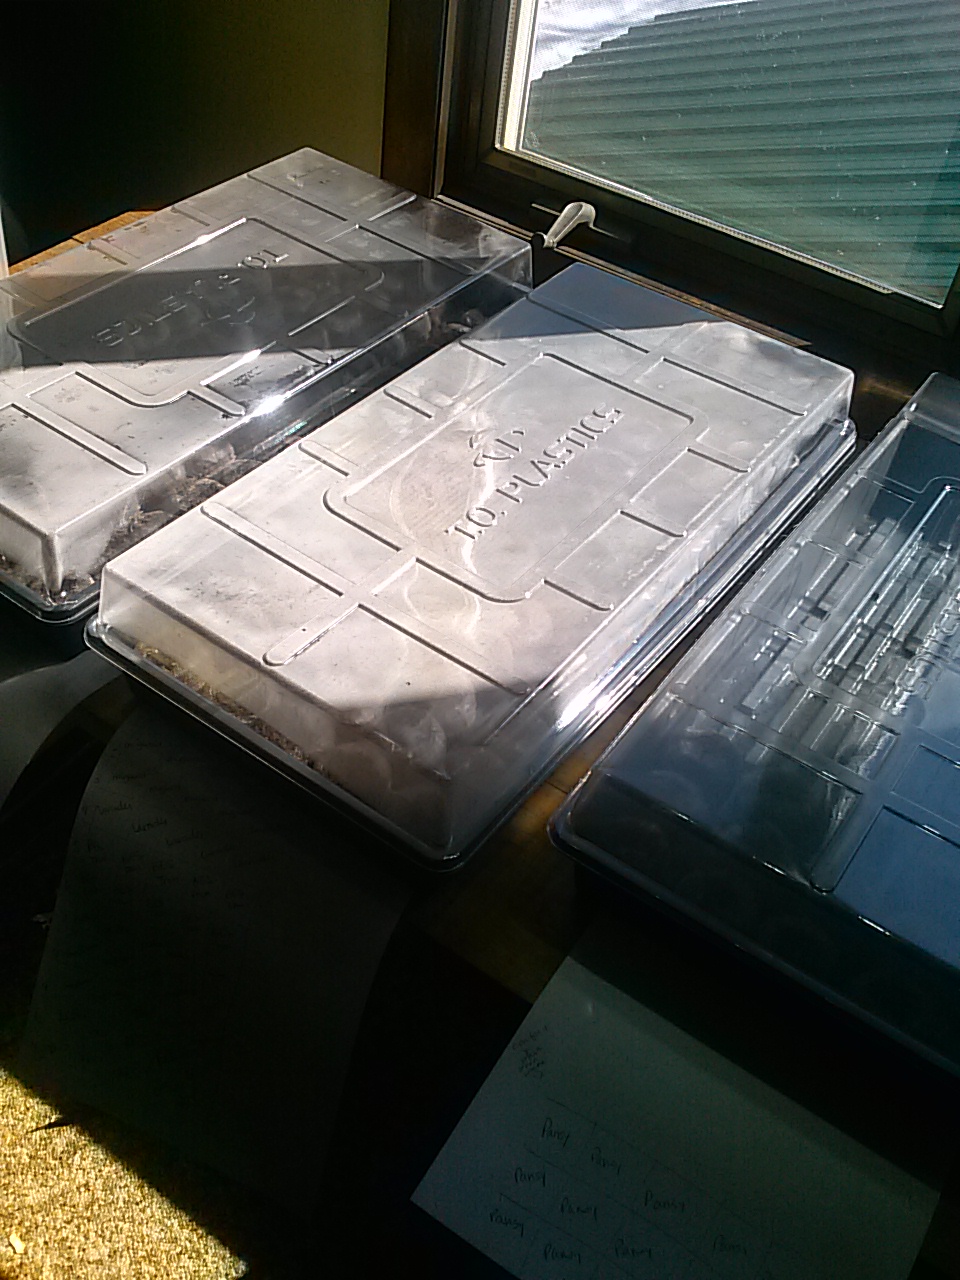
I have a south facing large window that I start seeds in, and I also have a grow light that I used last year, which was a big help and I will use again this year. I like to start a few more seeds for each kind of plant than I actually want, in case they don’t germinate correctly – it usually works out ok, and if I end up with some extra plants that is fine. I started 15 things today, 135 seeds total. I like using the peat pellets, that you “grow” with water and then press the seed into. They usually work pretty well. With my extensive garden plan, I figured I need to plant around 700 seeds this year – I ended up ordering 10 seed trays and a box of 1000 peat pellets. Today I used two full trays and part of a third one – the rest of that third tray will house my refrigerated seeds too, once they are ready to come out of the fridge.
My seed trays.
The table where the seeds are germinating used to be my cat’s window seat, and this is his first spring with us. Hopefully he won’t jump up and knock them off – I put things up to block his access for now.
I love seed-starting time. We still have snow outside but when it’s time to plant seeds it makes me feel like spring is really here.
Winter has seemed pretty long, even though we are having a relatively mild winter this year, here in the U.P. We have a lot of snow, although definitely not as much as last year, and it doesn’t seem like we have as much as I remember us getting when growing up here. The temps are still pretty harsh, but at least we get breaks in between the REALLY cold days (if you can call 15-20 degrees above zero a break – I do). This is always the time of year that everyone is tired of winter and just ready for it to be over. Just like most gardeners, I have been busy planning my garden for this spring.
I went all out with my planning for this year. In the past I usually have not been as organized – I usually plan some, but get a lot of stuff spontaneously later in the spring. I’m mostly used to gardening down in lower Michigan, but the Upper Peninsula has a shorter growing season. Our winters can be 6-8 months long (I have actually heard of snow in July here, although I don’t remember ever seeing it). I have grand plans of canning a lot of food for next winter, so I want to have everything ready, and make sure I have enough time to harvest everything – and have it all grow in time to be harvested. I learned a few things about this the hard way last year – I put in Tomatillos in July (they were just over pea sized by the time everything else was dying for the fall). I had a pumpkin plant that only produced one very small pumpkin, because they need 110 days – I just don’t have that long here. My tomatoes would not ripen on the vine – I ended up bringing them in and ripening them in a sunny window. (My mom said something about cutting the suckers off the plants to ripen them, which I’ve never had to do – the tomatoes I was growing didn’t seem to have these “suckers” that I could find).
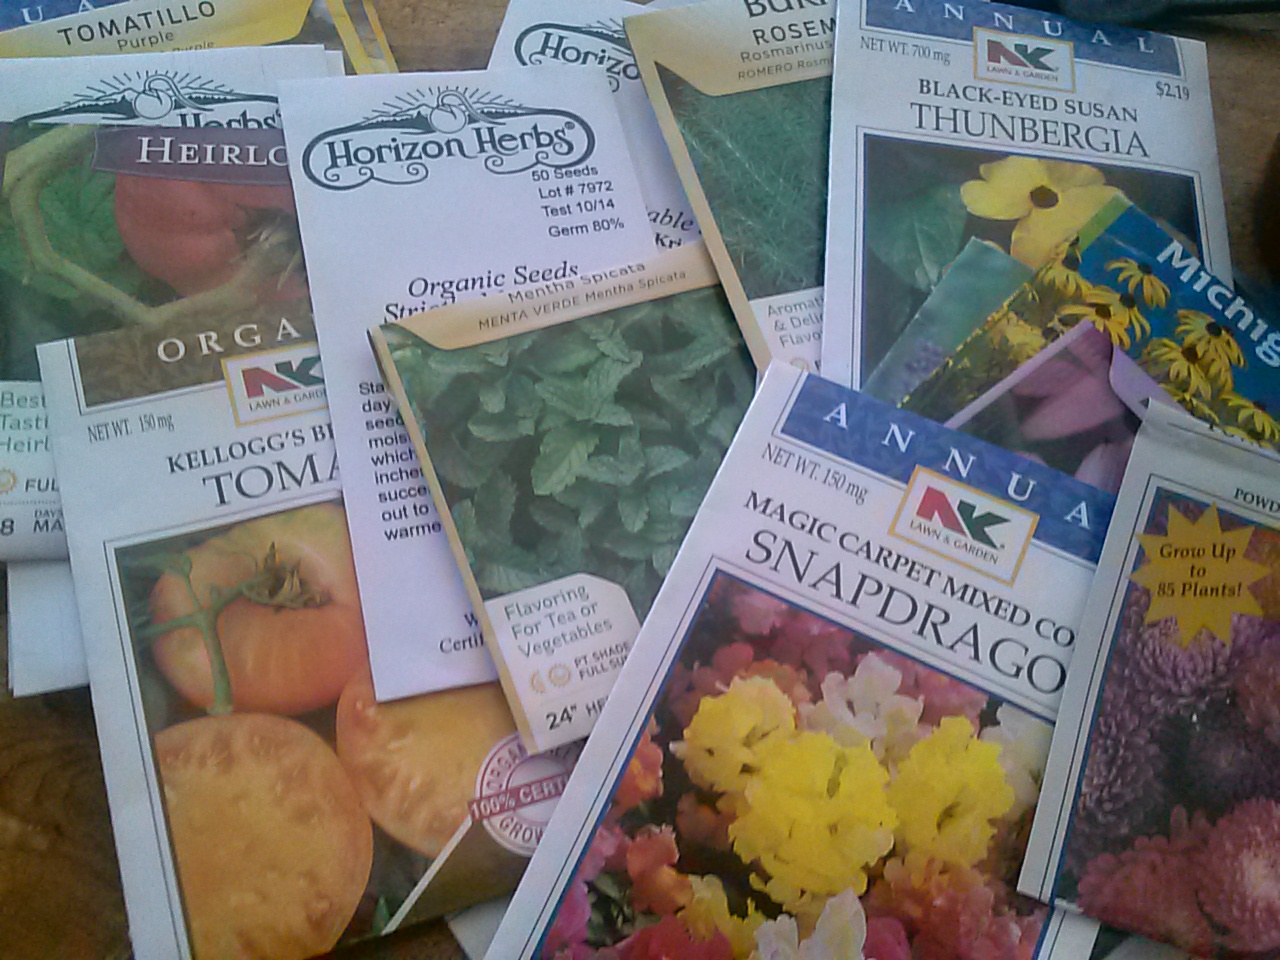
I went through my box of seed packets that I already had – some were leftover from previous years, and some were new “on sale” seeds I bought last fall. I figured out what I wanted to grow from those, and I looked online to see how long different kinds of seeds can last. Depending on the plant, seeds can be viable anywhere from 2 to 5 years. I actually had some really old packets from 2007/2008 – those got tossed. I ended up with a decent assortment of vegetables and flowers, but there were things I wanted to try this year that I needed new seeds for. So I got to ordering.
Last summer I got a nice catalog from a company called Horizon Herbs, and their catalog had lots of really good information about their seeds and a good variety of vegetables, herbs and flowers. So that is where I ordered my new seeds. They had some different “Ancient Grains” seeds, so I am going to try to grow Amaranth this year – it’s supposed to be good cooked up as an oatmeal kind of thing, and for bread. And I figure if we don’t end up liking it, the chickens probably will. I also found out that artichokes can grow as an annual, so I’m going to try to grow some – I don’t know how big the artichokes will actually be, but it’s worth a try.
I was careful when picking seeds out, from both my old supply and the new order, to make sure they are shorter maturing varieties. I have some white corn seeds that are 90 days, and I found one (yellow corn) from Horizon that needs 70 days (called Fisher’s Earliest).
I had made a rudimentary drawing before my order, but then because of some things not being available, and some changes to what I decided to grow, I redrew it. The new drawing actually plans for how big everything will get, and also has space so that we can actually walk between plants. (My son got mad at me last year trying to get around in our garden because it was a jungle without actual pathways between plants. He’d get trapped behind tomatoes trying to get to the zucchini).
Here is my main garden plan for this year.
The plan above is actually only one bed – a new one I’m planning. We built a fenced-in area for our dogs last year, and this will go next to it, utilizing one wall of fencing from the dogs’ area. I didn’t have space to draw it as one big 10×30 grid, so the drawing is split in half, side by side. I drew it on graph paper, making each square foot of the garden = 4 graph paper squares (so I could actually write names of plants in). I have another bed that will have acorn squash and watermelon, and onions, and some other stuff.
I also ended up ordering a few fruit plants for this year – raspberries and strawberries and elderberries – I’d like to try to make elderberry wine.
One other thing about gardening where I live is that I definitely need to fence it in. We have deer that will hop anything less than an 8 foot fence, I’ve been told. My garden last year was left alone by animals though, even though my fencing was pretty crude – I only had a 4 foot fence and it was made of old fence scraps I found around the yard (we didn’t have money at the time to buy new fencing). I found some snakes and toads in there (they helped me with bugs), but I never saw evidence of rabbits or deer. For this year we have some leftover 5 foot fencing (from making the dog fence in the fall) that I believe will be enough to close in the new garden bed – I’m hoping the fact that my dogs run around a lot in their enclosure, actually next to both gardens, will help to deter deer from jumping in.
Now I just have to wait for all my new seeds, and spring to get here!