I planted my new garden yesterday. Most of the plants are looking a little sad today, since we got rain last night. I think they’re fine and will perk up once we get some more sun. I’ve got lots of vegetables, with some flowers interspersed along the middle pathway. I ran out of room for my herbs because I wanted to grow various kinds of squash – zucchini, yellow squash, acorn, and butternut. I ended up with two small rows of mixed herbs – basil, rosemary, cayenne, lemon balm. (I meant to make a separate herb bed, but this new garden took up most of my energy this year).
The garden
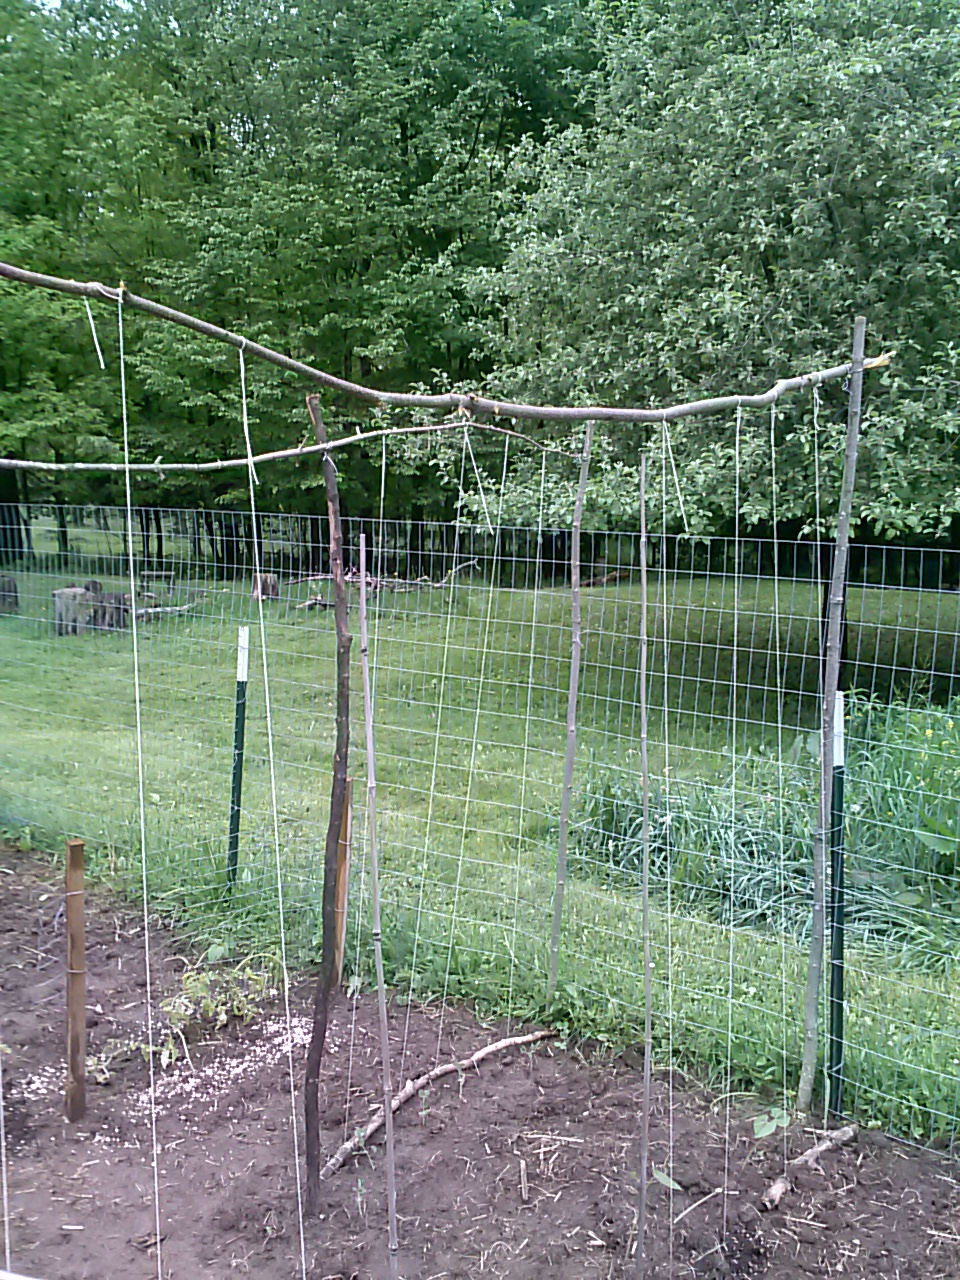
Instead of tomato cages I decided to use some leftover fencing attached to poles, and will attach the tomato plants to them as they grow. I made some supports for my beans and peas using saplings and string. I pounded the saplings in like fence posts, and then wire was used to hold the saplings together and to attach them to the fence.
bean and pea supports
The top poles are from the top of the saplings, and attached to the poles with wire. I then tied string and attached it to sticks at the bottom where the peas and beans are planted.
This is the corn patch. I have yellow and white corn seeds planted. I have sunflowers on the right, next to the fence, and some flowers along the path.Peas and Beanssquash and herbsPeppers and artichokes (on the top of this picture) and squash at the bottom
I realized I had started way too many plants. I had overestimated the amount of space I had. I also didn’t figure I’d get as good of a germ-rate as I did for some things. Next year I won’t start as many plants, and I won’t start them so early. The April-started plants were ok, but I think it would have been better to start them in May. My tomatoes were no longer happy in the pots they were in – hopefully they will be happier now that they are in the garden.
The garden looks pretty sparse now, but as things grow and fill in, it should look really nice.
I also planted some spinach and chard, and kale in my older garden bed behind the house. I had started carrots, beets, onions, and turnips a couple weeks ago, and some are starting to show up through the soil now.
I put some of my chickens to work today. My garden is just sitting, waiting for me to start planting this coming weekend when I have time. I want to get all the plants in at once. I decided to put a few chickens in there today, to scratch around and get any bugs out, and also to eat some of the grass that is at the fence line.
Here are a couple chickens scratching in the garden.
I chose to use some of my adult hens because I figured they may be more efficient, and also I didn’t want to cause any kind of anxiety issues with the teenager chickens. I thought that taking them out and then putting them back in the coop later may cause them unneeded anxiety, but that my adults would be able to handle it since they’re top of the pecking order. We put four hens in the garden in the morning before I left for work, with a little shelter made out of large flower pots and a piece of wood, in case they needed to get out of the sun.
Chickens in the garden – the little bowl here is for water for them.
My ladies did a good job – my garden seemed quite picked over; I could tell that they had scratched most of it up. I had made a pushed-down “trail” going through the middle, which will be my pathway, and that was completely gone by the time I got home. I could tell the grass at the fence line was a lot smaller as well.
The garden space is right next to our dog run. At first the hens were very scared when Atat ran out to see what they were doing. Downey was interested but not as playful as Atat. Atat ran up and started running up and down the fence line, and the chickens ran away back and forth from him, and then finally bundled up in the corner for awhile, till he went back inside.
Atat checking out the chickens.
My husband said it got better later during the day – when the dogs would come out they would just quietly watch the chickens pecking around in the dirt. The chickens relaxed a little when they figured out the dogs couldn’t get to them.
When I got home from work I put the ladies back in their own coop/run. I noticed that the pecking order in the coop was a little different before the hens were put back. Moving four hens to the garden gave the teenagers an advantage against the hens. Six teens to five hens – my teenagers seem a little more aggressive, which I take as a positive sign; they’ve been so scared of the hens until now – I saw one of my teens run up and peck a hen, instead of cowering when she walked by, which is what they usually do. The pecking order will shift a bit for awhile I bet, until they all get used to each other and figure out their places. That will probably be just in time for me to introduce the babies into the flock.
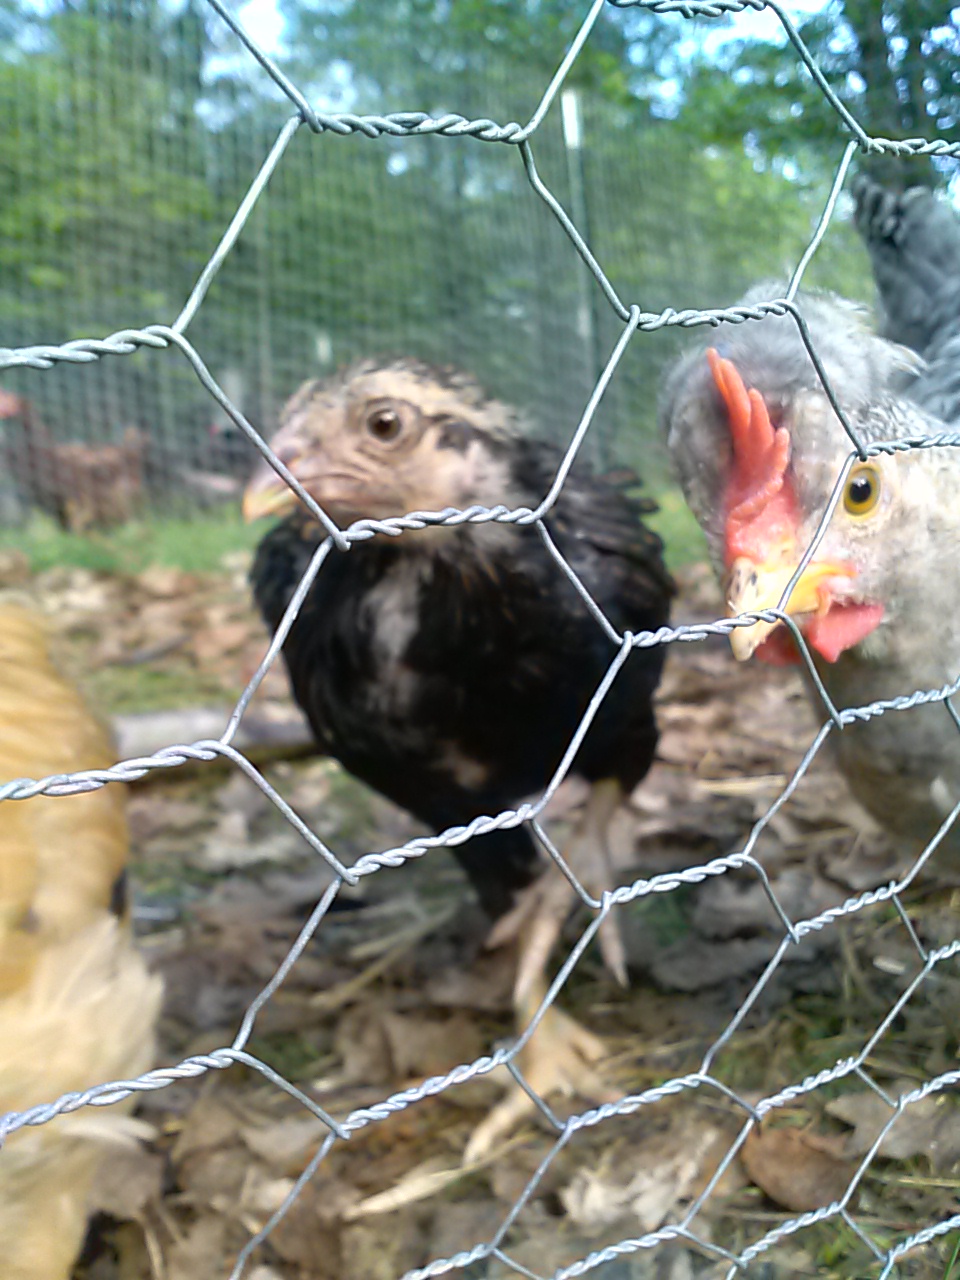
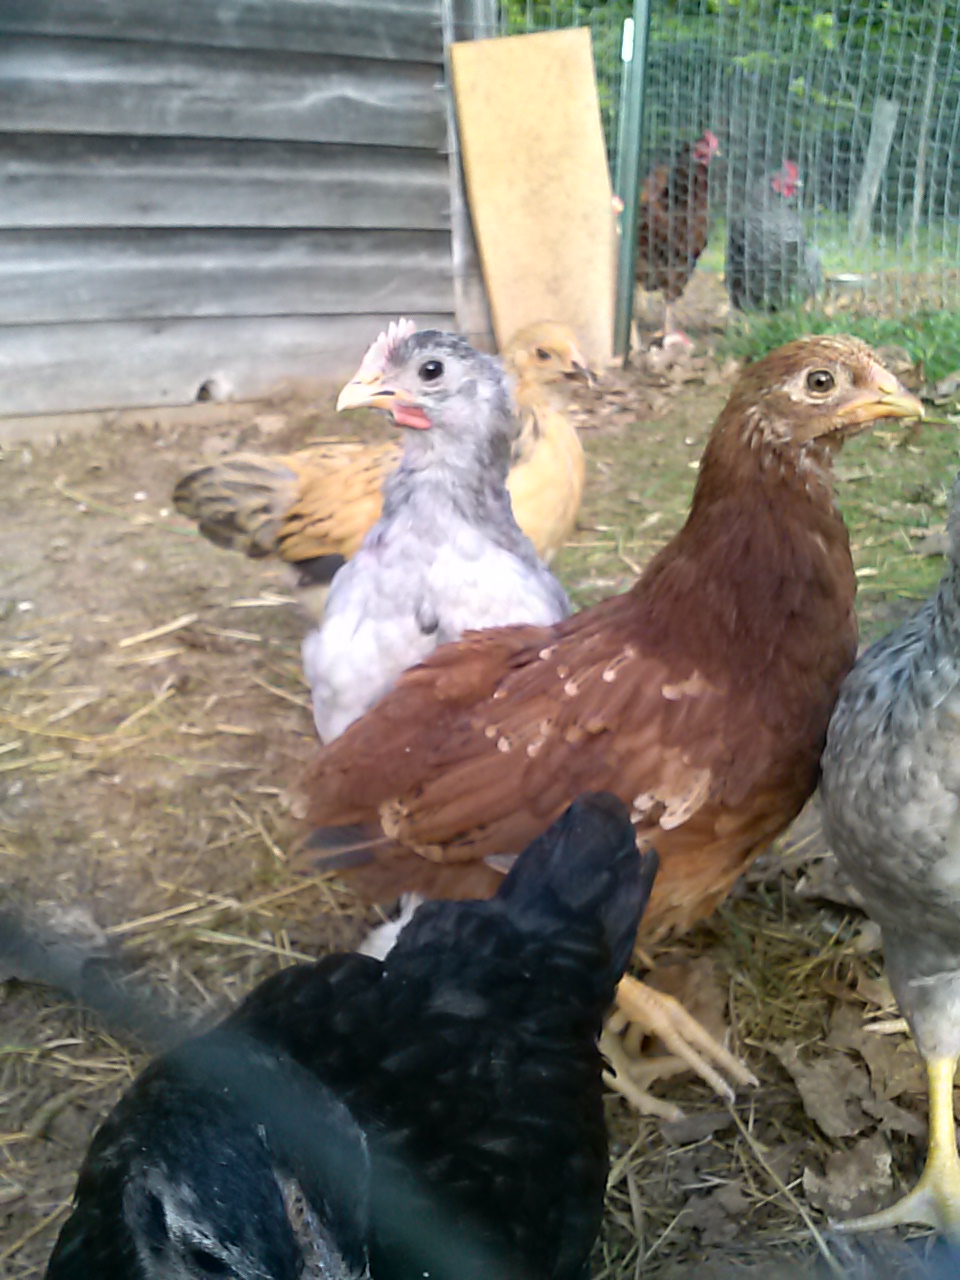
I meant to do an update on my smallest batch of chicks, showing how each one changed from one week to now; but I moved them outside before I could do that update. I don’t want to traumatize them by catching them all – it’s harder to do once they are out in the coop. I went to their coop with my camera and they were very curious; I think they were hopeful that I had some treats for them. Here are some cool pictures of the babies – they are now 6 weeks old.
Here you can see one of the Buff Brahmas on the left (we have two this batch) along with a red chick and our little rooster who has a strange puff of feathers behind his comb – this little rooster started crowing in the last week.Here’s our Black Sumatra (I believe that’s what he/she is – this is the escape artist) along with a gray/white chick (the dorking, I think) and the rooster.Here are my two small Buff Brahmas. I called these two “the twins” in the first photo shoot of them back in late April.Here’s my Sumatra (in front), the dorking, and the red chick.Here’s my brown speckled chick. He / she is a little more shy than some of the others. The rooster apparently likes to be in pictures, so he’s here too.The whitish/grayish chick is a White Brahma, I believe. She has feathered legs like the other Brahmas. And the rooster is here too.My white Brahma and my red chick, and a Brahma behind them.
They are getting big. I’m a little more able to tell what kind they are. A few of them I’m still not so sure (even with the “teenager” chicks I still have no idea, and they are pretty much adults).
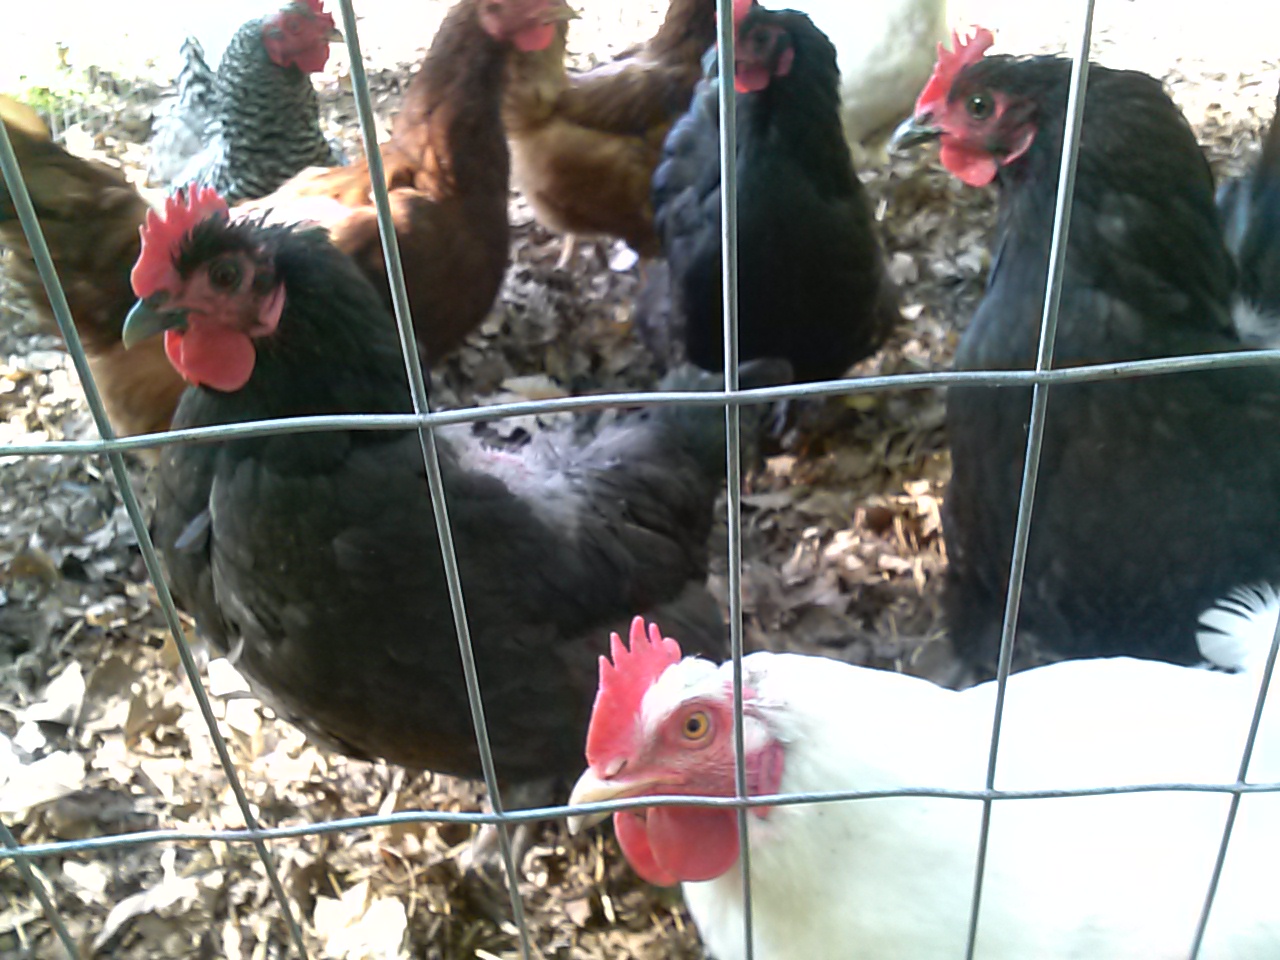
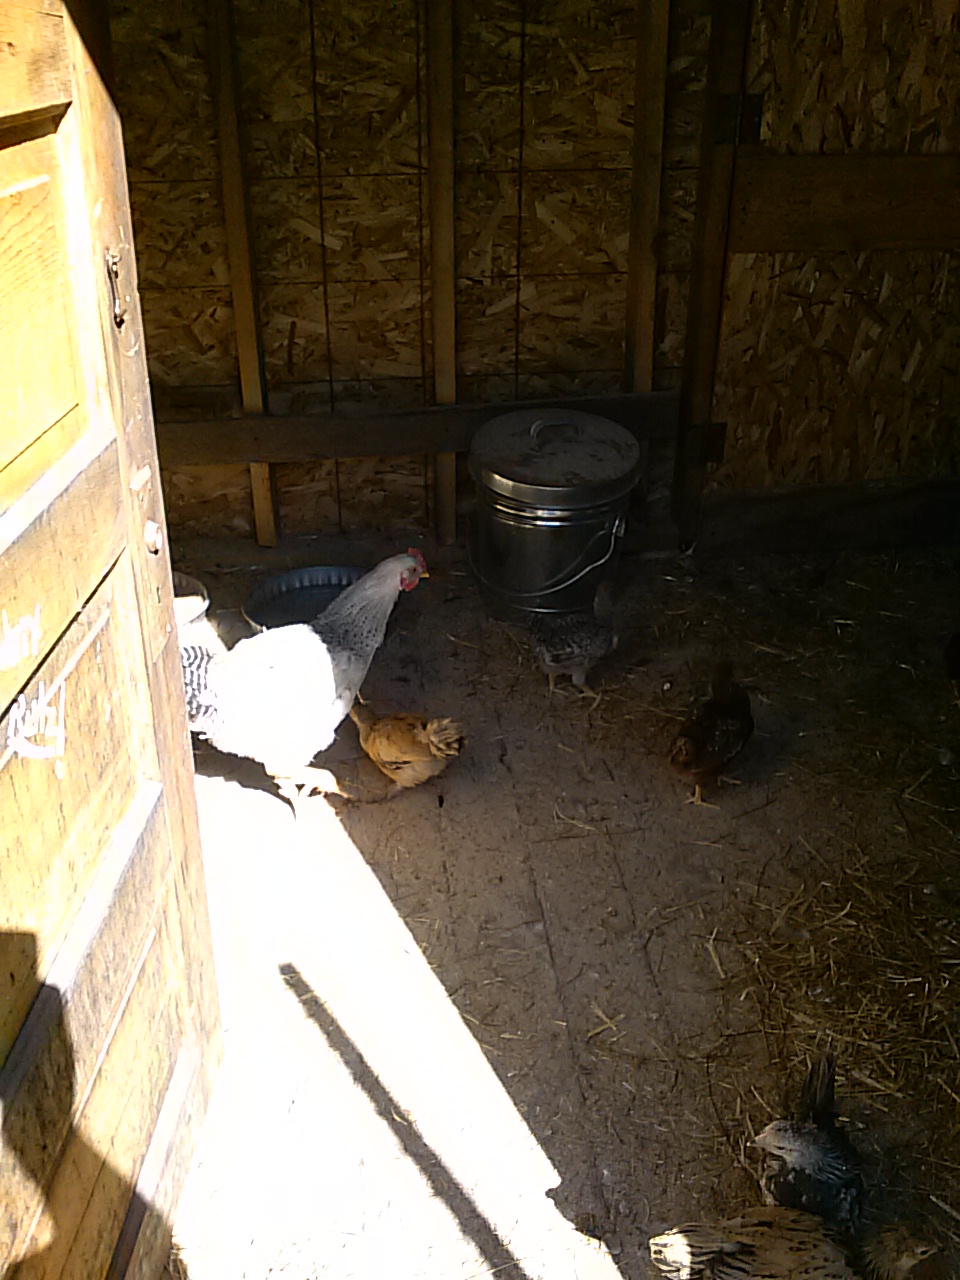
As you can see in some of the pictures above, my adult ladies were watching the photo shoot, wondering if I had any treats for them as well. Here they are:
Here are my adult hens.
My “teen” chicks were inside the coop eating instead of watching the photo shoot, so I didn’t get pictures of them today. They have been getting along better with the adults, but they still keep to themselves as a group instead of mingling with the adult hens.
I’ve been working on a new garden bed, and it’s finally ready to plant! I killed most of the grass using tarps and cardboard, and was going to hand-till it all up, but it’s quite large. I started to do a little work on it one night and was very daunted by the work involved. The grass had been very lush in that area – Killing the grass did not kill the roots, so the soil was very hard to dig into even with the grass gone.
I was very lucky and was able to borrow a rototiller from my uncle. So now the soil is ready for planting. We put a fence up around it today to keep deer out. Here’s the finished garden bed:
The long view of our new fenced in garden bedA diagonal view of the new bed.
I have been scrambling to get this bed ready for this weekend, because that was my goal for getting plants in. Our last frost date depends on who you talk to – some say May 15th, some say June 15th. Last year I had stuff in by the end of May and it was ok – you just have to watch the forecast for frost. We had frost warnings last night (I think some places got some frost) and we have frost warnings for the next two nights; I’m going to have to wait to put things into that bed. I do have some things already planted in a different bed, so I’ve been doing the “cover-up” scramble each night: covering up those plants at night, and then uncovering them each day once the sun is warming everything up. I need to check the weather and then hopefully I’ll start filling this bed up in the next week or so.
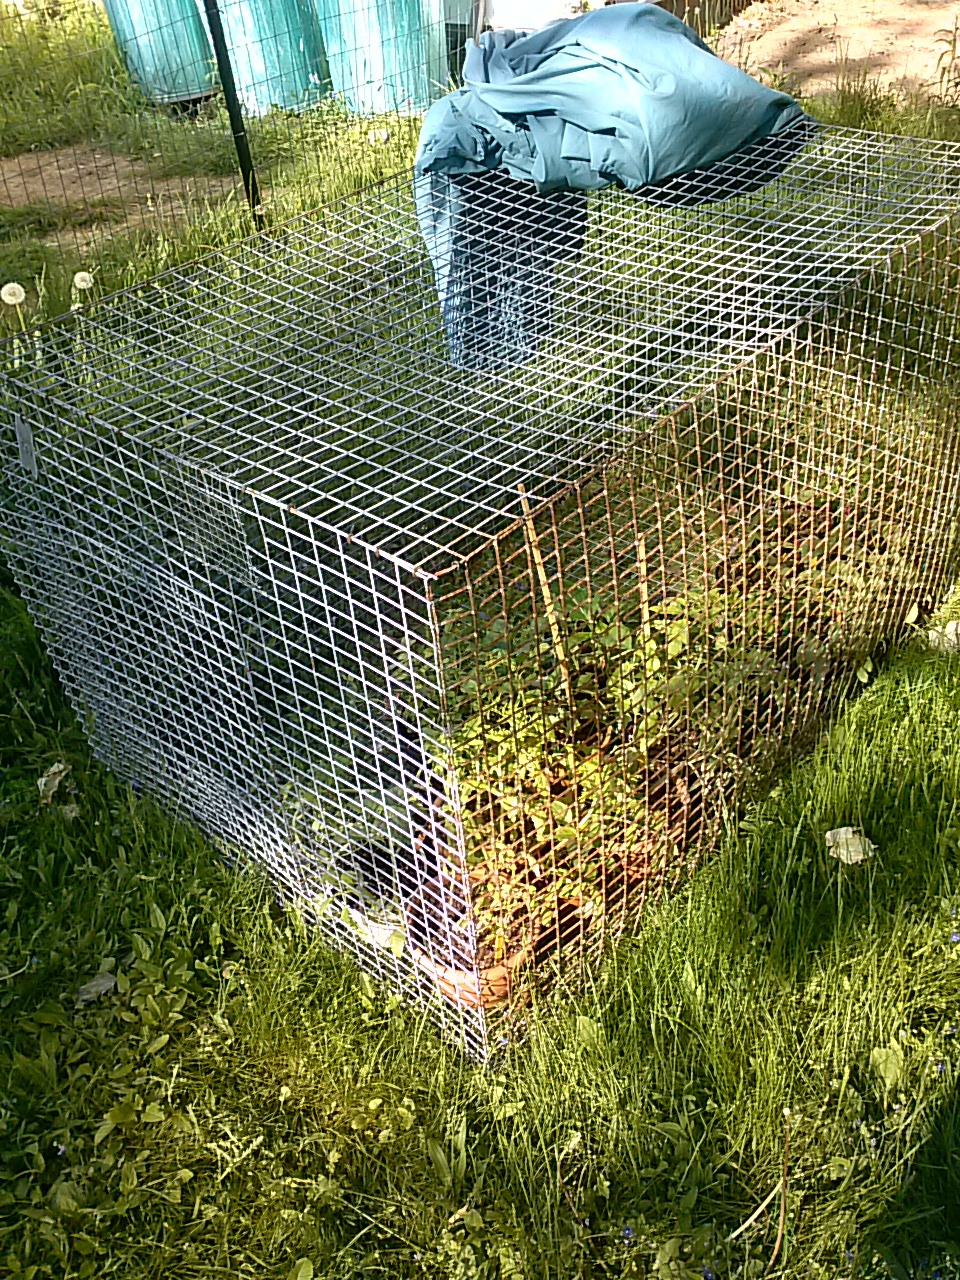
I have some plants hardening off outside. I put them inside a cage we have out there, which is easy to cover in case of frost. The cage also protects the plants from hungry animals. It’s been easier to block sunshine or rain, to get the plants used to being out there without them getting too much sun or water before they are acclimated. I put the plants out to harden off last week, figuring I’d have to block sunshine somewhat, and then we got several days of rain instead.
My plants hardening off in a cage.
I’m looking forward to being able to get everything in the new garden – I just hope our weather decides to cooperate soon.
* WARNING – if you are a vegetarian, you may want to skip this post.
My Silver Laced Wyandotte Rooster
My beautiful rooster got to be a problem – he would not leave my hens alone, he was constantly mounting them. Every one of them has a bare back right now – my white hens still have most of their feathers on their backs, but they always had dirty backs from his feet, and they were losing feathers on their heads. At first I hoped they were molting, but I eventually realized this was not the case, based on where they were losing feathers. I didn’t want to just separate the rooster from the hens, because I didn’t have a separate place to put him. I also know that several of my older chicks are roosters as well, so I will have to figure out who gets to stay/who has to go at some point anyway. This weekend, after spotting more bald spots on a particular hen’s head, I decided it was time for him to go.
I culled him with a quick chop, and butchered and cooked him, all by myself. Here are some things I learned:
1. Always read up on how to do things beforehand. Don’t just rely on stories people tell you, “well, Grandma used to do this…” I did not do research beforehand. I just went ahead and gave it a try. I was not sure how to make certain cuts when butchering. I also didn’t realize how hard some of those feathers would be to get out. I didn’t end up scalding him, so the wing feathers and pin feathers were extremely hard to pluck. I ended up cutting the wings off because I didn’t know what to do to get those feathers out.
2. Always let the meat rest in the fridge for a day before cooking or freezing. In the middle of roasting, I decided I should look up online how to butcher a chicken properly, for next time. That is where I learned that if you try to cook it right away, rigor mortis sets in and you will end up with a very chewy bird. We ended up with a very chewy bird. A day’s rest will let the rigor pass and the meat get soft again.
3. Do not overcook. I roasted it at too high of a temperature, and cooked for too long. This, along with the rigor, made our chicken very hard to chew at first. I do know how to cook a chicken, but I usually underestimate how long it will take when meal planning, and have to add time on, and we end up eating the side dishes while the meat is still cooking because it’s taking too long. So I went overboard on the cooking, and it showed.
4. Always have someone around that is an adult. My six year old son was there, and he didn’t like the rooster so he was happy to watch – the rooster was a little threatening to him most of the time. Daniel attempted to help me pluck feathers, for a minute, and then went back to playing. Then the neighbor kids showed up, while I was in the middle of plucking and butchering, and Daniel wanted them to all go inside. Our dogs are not the friendliest (well, Atat is, but Downey is not usually) and I yelled at Daniel to make sure they all stayed outside since I was arm deep in trying to butcher a chicken without really knowing what I was doing, and had no time to try to get the dogs out of the way. My husband was at work; I should have waited for him to get home before attempting all this on my own.
5. Always have all your stuff (knives, bags, towels, etc) ready beforehand. Nothing is worse than needing to make a cut in your chicken, and you somehow got dirt on your knife, and need to run to get a clean one, but don’t want to leave the chicken outside where the flies are already waiting to dig in. Also, always make sure your kitchen is clean so that you don’t have to attempt to butcher the chicken outside.
I muddled through, and did ok. The meat tasted really good, although I did have to put it in the crockpot on low the next day so that it was a lot more tender and we could actually eat it. I also realized why dark meat is called “dark meat” and white meat is called “white meat” – it was more pronounced on this bird than on regular store-bought chicken. I don’t know if it’s like that with all home-raised chickens, or the fact that he was almost a year old, or if it was just the breed. Silver Laced Wyandottes aren’t typically a meat bird, as far as I know.
Now that I’ve done it, and done the research afterward on what I should have done the first time, I think I’m ready for when the next time comes. As I said, I know that several of my chicks are probably roosters. Of my six older chicks (the “teenagers” as my son calls them), I’m 99% sure that 5 of them are roos. I don’t know how many of the eight little chicks are roosters yet. I can’t keep them all – we’ll have to decide who to keep and who gets eaten when they are older.
My art-room / spare bedroom has been a chick brooder since January of this year. The weather is warmer and I’ve decided I’ve had enough – my smallest chicks (one month old) have most of their feathers, and it’s been getting warmer lately. I wouldn’t be in such a rush but the escape artist has taught the others to escape – I’ve changed them to 3 different brooder boxes, each one taller, and they keep getting out and pooping everywhere. I’ve been thinking about ways to get them outside permanently.
I’ve had my older chicks (2.5 months old) outside for about a month, but separated from my adult chickens. They could see and hear each other, but not interact. We decided to try to integrate them, in order to bring the smaller chicks outside – I planned on putting the big chicks with the adults, and then putting the babies in the separate part that the older chicks had been in. I’ve heard to try to do it at bedtime, so they don’t really realize what’s going on, in order to keep the transition smoother. We did not do this for some reason. A few hours before I put them in for the night, we put the six 2.5 month olds in with the ten adults. They are very nearly the same size.
It was a mess. My poor chicks were traumatized. I figured my rooster would be the main culprit, but my hens were really mean. I know that they need to work out their pecking order, and it can take some time. First it was like two cliques – adult birds on one end of the run, the chicks on the other. Then somehow a couple chicks got separated and my hens started chasing them and trying to mount them, I guess. Then the chicks were in two groups of three. I went inside for a few minutes to let them work it out. I came back out and heard loud squawking. I found one of the chicks cowering in a corner of the run, trying to get back into their old run. It ended up with the chicks hiding inside a corner of the coop, and all the adults hanging out in the run. I was going to just let them sort it out, but I felt really bad. My chicks were really scared – one even kept losing feathers – I don’t know if it was from stress or from being pecked by the hens. I figured we will have to integrate them eventually, and they’ll work it out.
Then I brought the small one month old chicks out to the newly empty temporary coop/run. They were very happy out in the run. I wondered how they would get on with the older chicks, and if it would be better to integrate THEM right now, and then put all the chicks in with the adults later once everyone is the same size. I tried bringing the older chicks back in, one by one, and putting them out in the run with the tiny chicks
It seemed to go a lot better. The 2.5 month olds are quite a bit bigger than the 1 month old chicks, and they have been picking on them a bit, but they’re not obsessed with them like the adults seemed to be with the older chicks. If the small chicks stay away from the older ones, they don’t get pecked at all. The small chicks don’t seem too stressed, anyway.
My big chicks and large chicks together.Another picture of them together.
I had a couple of issues when putting them in for the night though – first, the little chicks had no idea what was going on. I have to get them trained to go in at night (usually I clap and follow the chickens in, the older ones have learned this pretty well) – so they didn’t go into the coop on their own when I did this. I picked them up, put them inside, and then a couple of them ran outside but their run was open so they ran into the yard. I had to catch them – that wasn’t too hard.
My biggest issue when putting them to bed was that the older chicks were hanging out right under the heat lamp, which was in the corner of the coop. The baby chicks found a nice spot on a pile of hay that they liked, since it was far away from the older chicks, but that wasn’t close to the heat lamp, and I worry about it getting cold at night if they can’t access the lamp. My husband was smart and just moved the heat lamp to the middle of the room for me – so that problem got solved. I also gave the babies some straw to go on their hay pile, because hay is NOT very soft, at least compared to straw. I put the water and food a bit more in the middle, so that the babies wouldn’t have to go too near to the older chicks to eat or drink, and risk getting picked on. We checked on them through the night before we went to bed, and they were doing ok.
This morning I went out, and the poor little babies were huddled in their corner. It got into the 30s last night, and while the heat lamp makes the inside of the coop quite a bit warmer than the outside temps, they were still pretty cold. They were doing ok, but the big chicks kept going over to them and pecking them, just in the time I was out there this morning to let them all out. The big chicks were also hanging out under the heat lamp in the middle, so the little guys couldn’t go over to the heat light, or the food and water without getting pecked. So I got fed up, and stuck the big chicks in with the adults again, and said “you are all just going to have to figure it out. ”
The babies are now doing good. The larger chicks are hiding out in the coop, but the food and water are in there, so they will be ok if they decide not to go outside today with the adults. Like I said, they are almost adult sized, so they should be a lot better able to defend themselves against the adults, than the tiny chicks are with them. They’ll just have to work it out on their own. I didn’t realize it would be this much of a mess to integrate them all.
I’m starting a new garden bed this year, and it is in an area where our lawn is typically very lush. I was going to do a lasagna-style (layered) garden, but I don’t have enough dirt for the top layer. The garden is going to be 10×30 feet in size. So in mid April I decided to try to cover the grass to kill it, which would make tilling it a lot easier, and prevent me from having to dig up all that grass.
I marked the corners of the bed, and then used what I had on hand – large cardboard pieces, plastic tarps, and even a big sheet of metal. I placed rocks and pieces of wood on top to hold everything down.
Here is what it looked like with all the supposedly-grass-killing coverings:
Here is the bed with tarps, cardboard, and even metal trying to cover / kill the grass.
I uncovered it all today because I’d like to start getting it ready – I have plants waiting to go in. I could tell over the last month that there were areas I’d still have to pull grass out from. I found out today that the plastic tarps acted more as a greenhouse for the grass than as a grass killer. The cardboard was the best thing – those areas are almost bare – the soil will be a lot easier to till. The metal sheet worked well also. Sheets of plywood or particle board would work as well – I found this out by accident when we left some scraps out a few weeks ago in an area where we didn’t want the grass killed.
I’m not going to be doing any tilling for a couple days, so I took the cardboard pieces and placed them over the still-very-grassy areas, in an effort to at least keep the grass from getting any bigger in those spots. Here is my bed now:
My garden bed as of today.Darn grass! Here’s one small strip I’ll have to dig up.
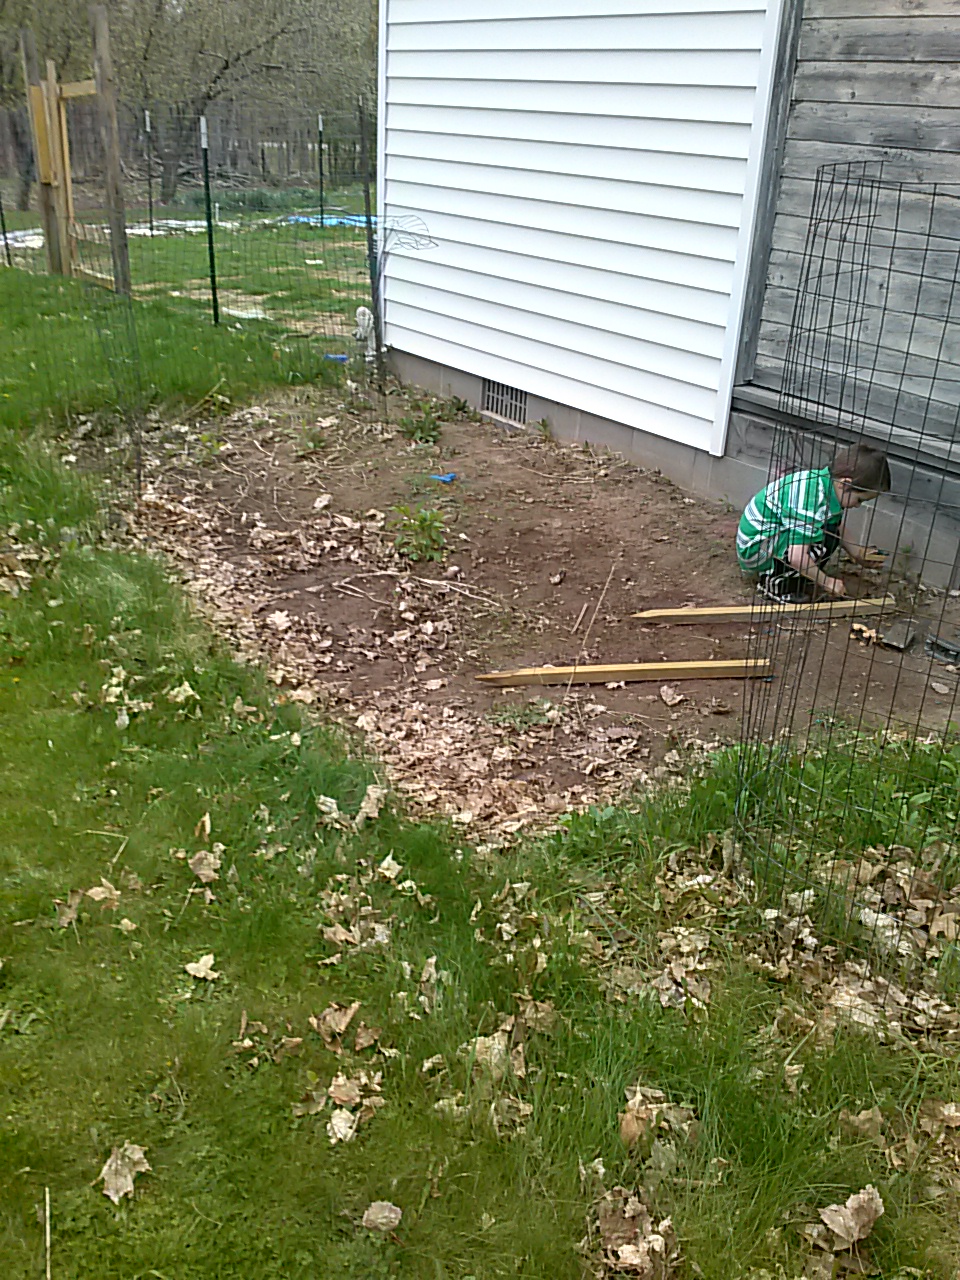
Once I get it all tilled, I will be fencing it in, and then planting! I think this little guy is excited too:
I’m still plugging away at the back garden bed from last year – there was a big section that I didn’t expand last year, that was still full of grass. I claimed that part from the lawn tonight by creating a lasagna garden. It’s a whole lot easier than trying to dig up all that grass.
I took my old cardboard chicken corral/brooder box from my older chicks, pulled it apart, and laid it over the grassy area, which was roughly 8-10 ft long x 3-4 ft. wide. The cardboard will kill the grass and any weeds. Then I threw a little dirt on top to hold the cardboard in place and to add some weight to it. I grabbed compost material and spread it around the whole cardboarded spot. Typically for a lasagna garden you layer different things – leaves, grass clippings, other materials you have on hand. My compost material was a big mix of leaves and chicken bedding, so I just put it as one large layer. That is as far as I got tonight; tomorrow I will add some dirt on top of the whole thing. It will then be ready for planting. Most of this section is planned for a bunch of strawberry plants I ordered – they should be here any day so I need this spot ready for it.
Long view of the new lasagna area with compost on top – you can see the area beyond it that I worked on last night (for info on that, see my last post – Heavy Lifting).Here’s the short view of the lasagna garden, where it comes all the way to the edge of the house. Now it’s a big rectangle behind our house so my fence will be able to be a lot neater-shaped this year.
Some other nice pics of how things are going this spring on the mini farm:
Our cherry tree is in bloom.Shot of our chicken coop across the back yard, shot from beyond the cherry tree near the tire swing.The messy tarp area in this picture is going to be my new larger garden bed. I’m attempting to kill the grass, but I may have to lasagna this bed too. I was trying to kill the grass instead because I don’t know where I will get enough dirt to cover this space. We’ll see. The fenced in area here is our dog pen.
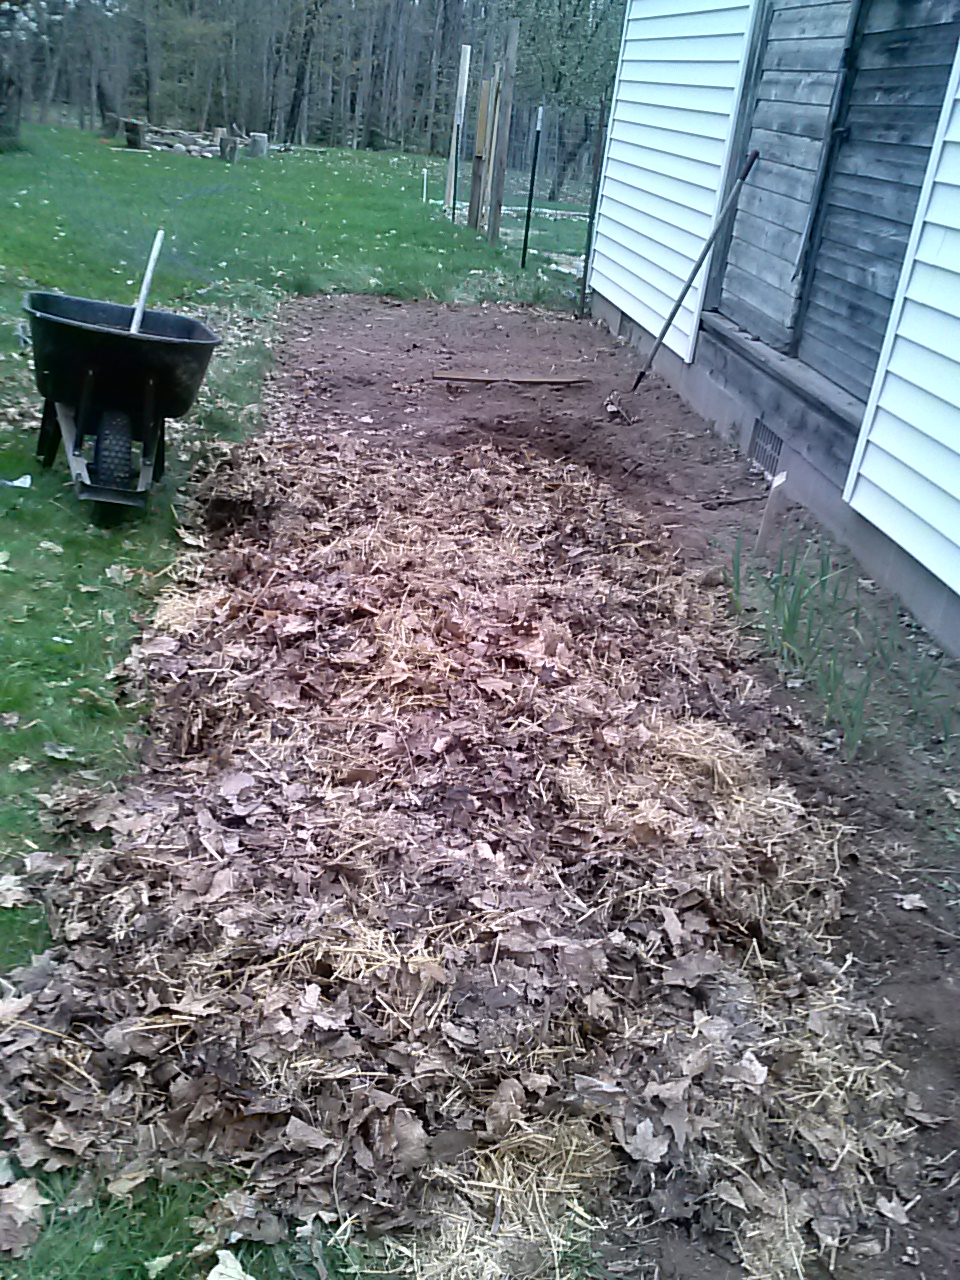
I’m working on getting the garden beds ready for this year’s plantings. Tonight after work, I wanted to start working on my old garden bed from last year, which is at the back of our house. I’ve been eying it lately, realizing I’d have some work to do to get it ready. My parents used it for several years, and then we planted in it last year, so the soil is ok, but not wonderful. I dug it a little bigger last year – it’s now about 25×6′ in most of the garden – there is a spot that is still grassy that I will tackle in the next few days. The part closest to the house is very sandy, and as you get further away it’s very clay soil with lots of rocks. I added some amendments last year – newer soil, some leaves, grass clippings, but it will probably take a few years of amending it to get it really nice.
Here’s what the back garden bed looked like before we started on it tonight.
It was pretty dry here the last few weeks, so the soil was very compacted. We got some good rain the last couple of days so I thought tonight would be a good night to try to till it, because it would be softer – I do not have a rototiller that works, so I have to do it by hand. With my trusty helper (my son Daniel) by my side, we chopped up some of the top layer of soil. My plan was to pull the weeds that were setting up in there, move the top few inches of soil, and bury some compost into it. Our compost isn’t fully composted yet, but I have a good mix of old chicken bedding/poop and leaves sitting on the compost pile that I decided to use.
Working in sections, I would move the soil we’d broken up and dump in a wheel barrow full of compost material, and then bury it. I also tried to move the sand/clay portions of dirt around so it’s more mixed together. Here is the finished section we did tonight – there’s still quite a bit of work to do since we only had time for about a 6-8 foot section tonight, but it goes pretty fast once you get the dirt broken up. It’s a lot of shoveling. I think the bed will work nicely though. I have some Kale seedlings that I need to get planted soon.
A section of the back garden that we finished layering compost material into.
It got to 89 degrees on Thursday here – I wandered around the yard taking pictures. Here’s a nice photo tour of our yard – Spring is in full swing. It was 89, and next week they are saying we are supposed to get some snow showers – I think (hope!) it will just be mixed with rain and not actually stick to the ground. We’ll see; it’s the U.P. after all. Sigh…
Our yard is greening up nicely. We need to get the mower out soon.Daffodils in the woods.More daffodils in the woods behind our house.This is the mystery plant from my Leeks post last week – they are now getting yellow flowers. I still don’t know what these are – if you know, please leave me a comment.Another one of the mystery flowers – they grow in the woods.Our willow tree in the front yard. The trees are all getting buds now.My garlic is doing well – I planted this last fall. This is my first time growing garlic.This is supposed to be an asparagus patch. My mom kept it as one for a long time, but it stopped producing. I replanted it last year. It’s surrounded by narcissus, which are not blooming yet, and need to be divided. So far my asparagus has not appeared again, although we have a rhubarb (on the right) and a large mullein growing here (on the left).